License Manager
The License Manager (Formerly Team License Manager) provides you full access to information on Team Licenses currently in your account. This grants you the ability to purchase Team Licenses, with tools that allow you to manage where these licenses are assigned within your organization.
Confirming Your Account as a Team License Manager
License Manager Overview
Adding Licenses
Assigning Licenses
Related Articles:
Accepting Team License Invitations
Domain Licenses
Team Manager
If it's your first time accessing the License Manager in the Dashboard, you will be prompted to confirm your account as a Team License Manager first.

Click Confirm in the popup to unlock License Manager in your account.
Once confirmed, the License Manager Dashboard Page will become available to you, as shown below:

There are two sections in the License Manager page, which gives you full control and provides an overview on your account's Team Licenses.
The License Summary gives you an overview of the Team Licenses that's currently in your account.

License Type
Shows you the name and the subscription type (duration) of the license
Total
The total number of Team Licenses in your account
Active
The number of Team Licenses taken (a combination of those taken through Domain Licensing and Team License invites that were accepted)
Reserved
Shows the number of Team/Domain licenses that are not yet claimed/accepted
Available
Shows the number of Licenses still available that are not yet in use
Renewal Date
Shows the date in which the Team Licenses will renew
Here is where the email addresses of those using your Team Licenses are shown so you can monitor and manage their status.
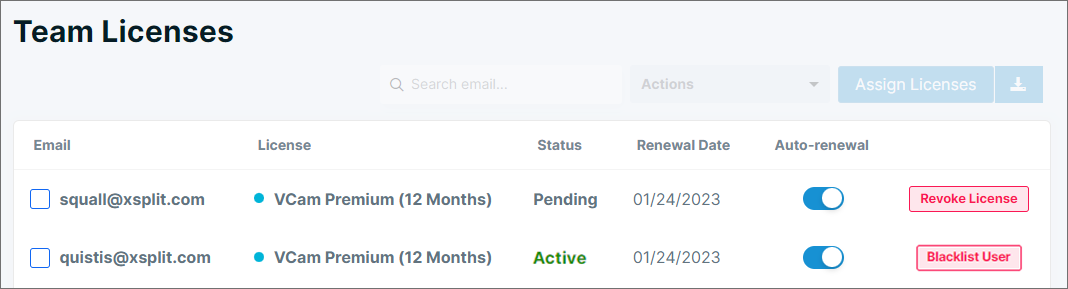
Email
Shows the email address of the Team License recipient
License
Shows you the name and the subscription type (duration) of the License
Status
Shows whether the license is still Pending (user hasn't accepted the license yet) or Active (The Team License was accepted by the user)
Renewal Date
Shows when the current license will renew
Auto-Renewal
Enable this to allow the license to automatically re-subscribe the user once it has reached the Renewal Date
Revoke License
Removes the email address from the list, which also removes any licenses granted upon the account.
Blacklist User
This puts the email address to the License Manager blacklist, which filters and prevents it from receiving any Team Licenses in the future.
Team Licenses can be purchased directly from the License Manager. To do this, click Add Licenses.
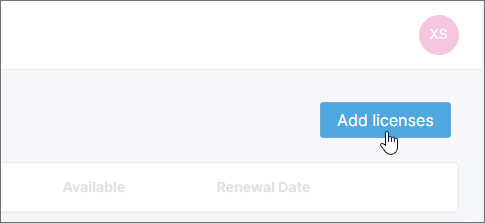
A popup will open and here you can customize the type of License you'd like to purchase.
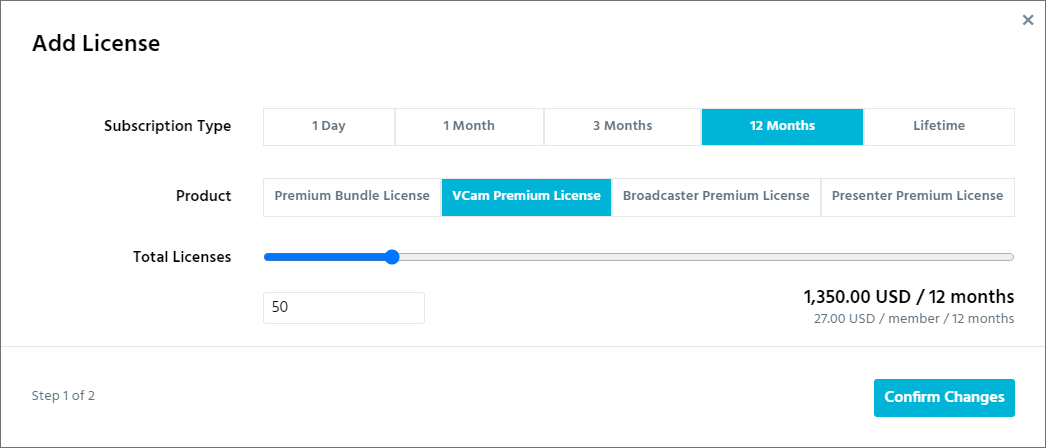
Subscription Type
Allows you to select the duration of the license. (Choose from 1 Day, 1 Month, 3 Months, 12 Months, and Lifetime)
Product
Here you can select the type of XSplit Team License you'd like to purchase. (choose from Premium Bundle License, VCam Premium License, Broadcaster Premium License, and Presenter Premium License)
Total Licenses
Determines the number of Team Licenses you'd like to purchase. You can drag the slider left/right, or type the number directly.
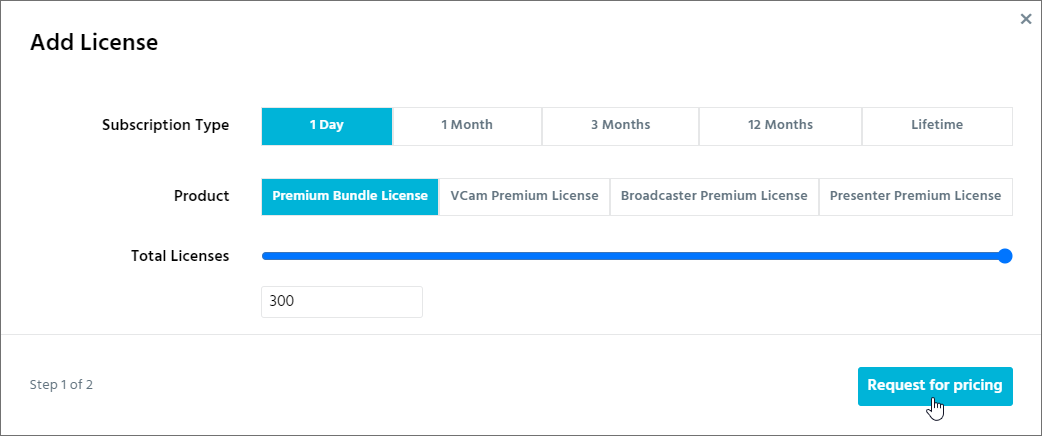
The total price will be displayed on screen. Once done, click Confirm Changes to proceed to the next step.
For 300 license or more, the Confirm Changes button will be replaced with Request for Pricing. Click the Request for Pricing button and our Sales Team will assist you through chat.
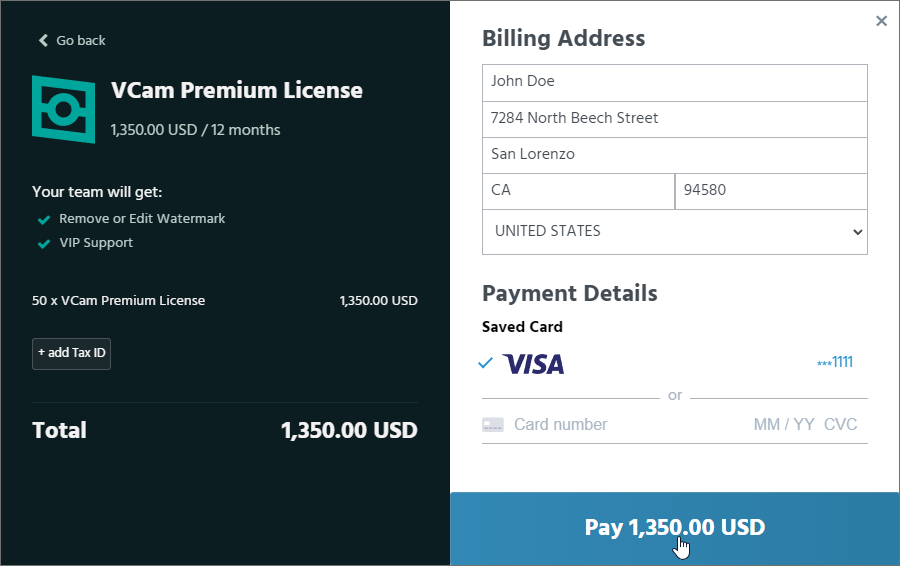
You will see a summary of the License you intend to purchase. Once you have confirmed the license information to be correct, enter your address and credit card details, then click the Pay button at the lower-right corner to complete the payment process.
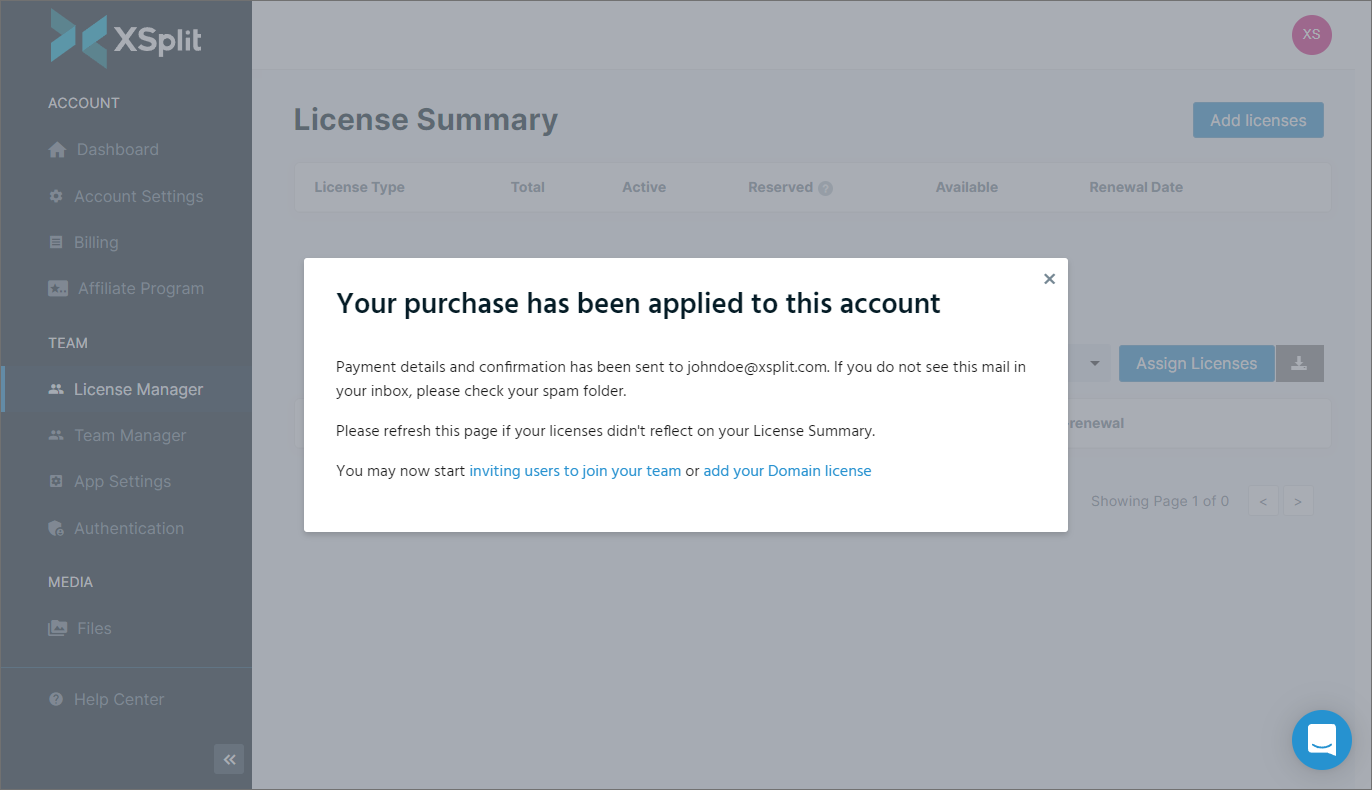
Once done, you will receive a confirmation popup.
Your newly-purchased licenses should now be visible in your License Summary.
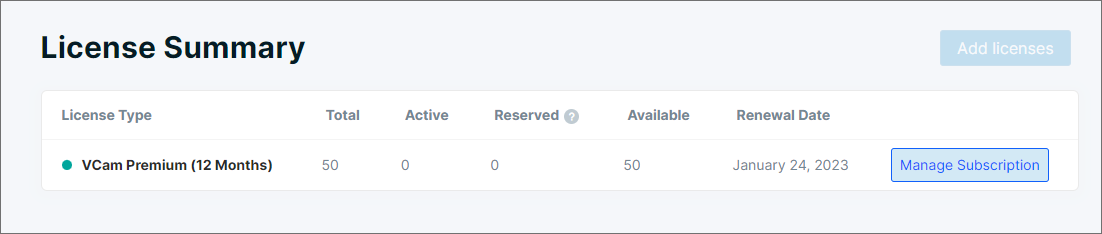
If you want to add more licenses to your current subscription, you can do so by clicking the Manage Subscription button in the License Summary.

This button is available only when you have an existing subscription in the License Summary.
The Add License popup will appear and it should automatically select the Subscription Type and Product for you.
When adding the exact same type of license, it should show the number of licenses you currently have, as well as the number of additional licenses you are planning to purchase.
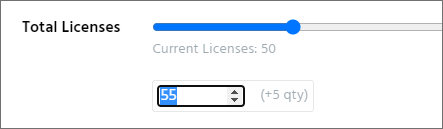
Here you can adjust the number of licenses you would like to add on top of your existing subscription. Click Confirm Changes once done.
It's not possible to reverse the payment of your existing license using Manage Subscription. If you have purchased an incorrect number of licenses by mistake, please contact Support by clicking the Chat icon to the lower-right corner of the XSplit webpage.
You will see a summary of your Current Plan and the New Plan, with details on how much the extra cost will be. By default, this transaction will utilize the last debit/credit card details you have used. You can change this by selecting the Change Payment Method link.
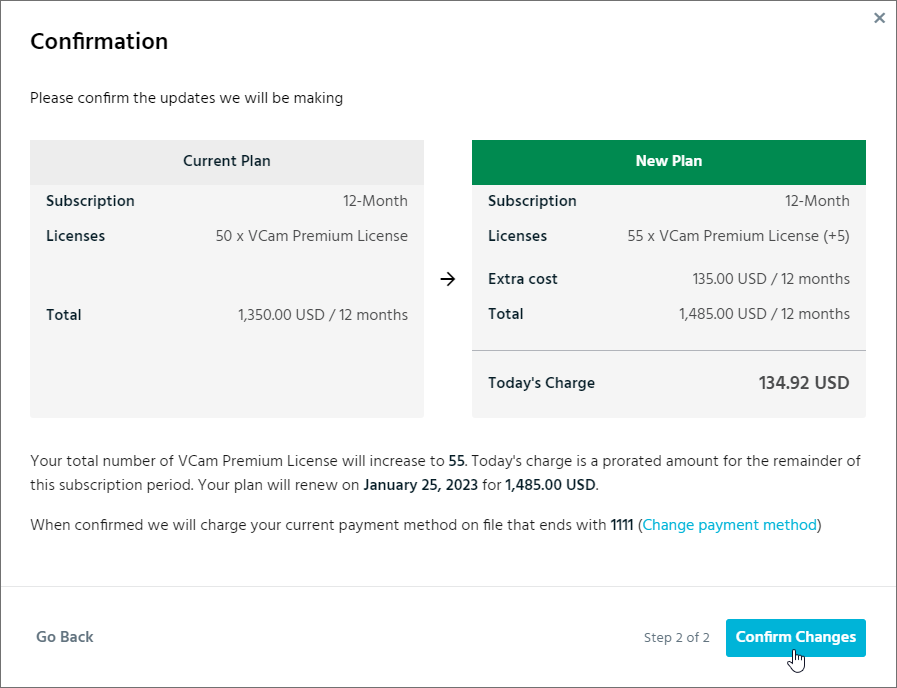
Click Confirm Changes to complete the payment.
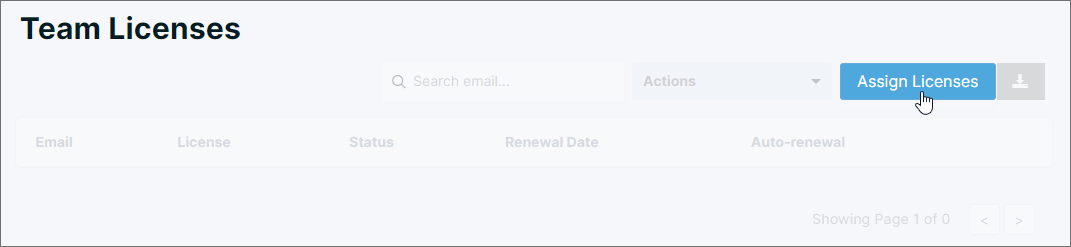
Once you have successfully purchased your Team Licenses, you can now start assigning these licenses in your organization. To do this, click Assign Licenses in the Team Licenses section of the License Manager.
The Add Users popup should appear. Here you can add the email addresses of your recipients in the box provided. You may also select Upload CSV if you have a CSV file with your recipients' email addresses.
The License Type allows you to choose which License you would like to give to these users, based on your currently available Team Licenses.
We recommend keeping "Send Email to users about the license offer" checked, so your recipients will receive an email invitation with a link that will make it easier for them to accept the license.
Click Submit once done. The email addresses are now added to your Team Licenses roster.

The Status of each newly-added email address is Pending, which indicates they have not accepted the Team License Invitation yet.
Click here to learn how recipients can accept Team License invitations.
Using the Bulk Action Tool is useful if you want to perform mass changes to your Team License list.
To do this, click the checkbox next to the email addresses you wish to modify, click Actions, then choose whether you'd like to Revoke Licenses or Delete Expired Licenses.

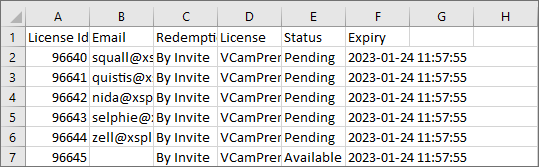
Click on the Download icon next to Assign Licenses. This will allow you to download a copy of your Team License recipients in CSV file format.
Confirming Your Account as a Team License Manager
License Manager Overview
Adding Licenses
Assigning Licenses
Related Articles:
Accepting Team License Invitations
Domain Licenses
Team Manager
Confirming Your Account as a Team License Manager
If it's your first time accessing the License Manager in the Dashboard, you will be prompted to confirm your account as a Team License Manager first.
Click Confirm in the popup to unlock License Manager in your account.
Once confirmed, the License Manager Dashboard Page will become available to you, as shown below:
License Manager Overview
There are two sections in the License Manager page, which gives you full control and provides an overview on your account's Team Licenses.
License Summary
The License Summary gives you an overview of the Team Licenses that's currently in your account.
License Type
Shows you the name and the subscription type (duration) of the license
Total
The total number of Team Licenses in your account
Active
The number of Team Licenses taken (a combination of those taken through Domain Licensing and Team License invites that were accepted)
Reserved
Shows the number of Team/Domain licenses that are not yet claimed/accepted
Available
Shows the number of Licenses still available that are not yet in use
Renewal Date
Shows the date in which the Team Licenses will renew
Team Licenses
Here is where the email addresses of those using your Team Licenses are shown so you can monitor and manage their status.
Shows the email address of the Team License recipient
License
Shows you the name and the subscription type (duration) of the License
Status
Shows whether the license is still Pending (user hasn't accepted the license yet) or Active (The Team License was accepted by the user)
Renewal Date
Shows when the current license will renew
Auto-Renewal
Enable this to allow the license to automatically re-subscribe the user once it has reached the Renewal Date
Revoke License
Removes the email address from the list, which also removes any licenses granted upon the account.
Blacklist User
This puts the email address to the License Manager blacklist, which filters and prevents it from receiving any Team Licenses in the future.
Adding Licenses
Team Licenses can be purchased directly from the License Manager. To do this, click Add Licenses.
A popup will open and here you can customize the type of License you'd like to purchase.
Subscription Type
Allows you to select the duration of the license. (Choose from 1 Day, 1 Month, 3 Months, 12 Months, and Lifetime)
Product
Here you can select the type of XSplit Team License you'd like to purchase. (choose from Premium Bundle License, VCam Premium License, Broadcaster Premium License, and Presenter Premium License)
Total Licenses
Determines the number of Team Licenses you'd like to purchase. You can drag the slider left/right, or type the number directly.
The total price will be displayed on screen. Once done, click Confirm Changes to proceed to the next step.
For 300 license or more, the Confirm Changes button will be replaced with Request for Pricing. Click the Request for Pricing button and our Sales Team will assist you through chat.
You will see a summary of the License you intend to purchase. Once you have confirmed the license information to be correct, enter your address and credit card details, then click the Pay button at the lower-right corner to complete the payment process.
Once done, you will receive a confirmation popup.
Your newly-purchased licenses should now be visible in your License Summary.
Manage Subscription
If you want to add more licenses to your current subscription, you can do so by clicking the Manage Subscription button in the License Summary.
This button is available only when you have an existing subscription in the License Summary.
The Add License popup will appear and it should automatically select the Subscription Type and Product for you.
When adding the exact same type of license, it should show the number of licenses you currently have, as well as the number of additional licenses you are planning to purchase.
Here you can adjust the number of licenses you would like to add on top of your existing subscription. Click Confirm Changes once done.
It's not possible to reverse the payment of your existing license using Manage Subscription. If you have purchased an incorrect number of licenses by mistake, please contact Support by clicking the Chat icon to the lower-right corner of the XSplit webpage.
You will see a summary of your Current Plan and the New Plan, with details on how much the extra cost will be. By default, this transaction will utilize the last debit/credit card details you have used. You can change this by selecting the Change Payment Method link.
Click Confirm Changes to complete the payment.
Assigning Licenses
Once you have successfully purchased your Team Licenses, you can now start assigning these licenses in your organization. To do this, click Assign Licenses in the Team Licenses section of the License Manager.
The Add Users popup should appear. Here you can add the email addresses of your recipients in the box provided. You may also select Upload CSV if you have a CSV file with your recipients' email addresses.
The License Type allows you to choose which License you would like to give to these users, based on your currently available Team Licenses.
We recommend keeping "Send Email to users about the license offer" checked, so your recipients will receive an email invitation with a link that will make it easier for them to accept the license.
Click Submit once done. The email addresses are now added to your Team Licenses roster.
The Status of each newly-added email address is Pending, which indicates they have not accepted the Team License Invitation yet.
Click here to learn how recipients can accept Team License invitations.
Bulk Actions
Using the Bulk Action Tool is useful if you want to perform mass changes to your Team License list.
To do this, click the checkbox next to the email addresses you wish to modify, click Actions, then choose whether you'd like to Revoke Licenses or Delete Expired Licenses.
Download CSV
Click on the Download icon next to Assign Licenses. This will allow you to download a copy of your Team License recipients in CSV file format.
Updated on: 06/09/2022
Thank you!