Streaming to Facebook Live
Expand your popularity by streaming to Facebook Live! This guide will show you how you can easily register to XSplit using your Facebook account and stream to your page.
- Sign In
- Set Up Your Presentation
- Set Up a Facebook Output
- Start Your Facebook Livestream
- Scheduling a Facebook Live Broadcast
Sign In
When launching XSplit Broadcaster for the first time, you'll be asked to Sign In or Sign Up for an XSplit account to use the app. Click the Sign In button if you've already created an account. if
Once you've clicked sign in, the app will use your browser to authenticate your XSplit account so make sure that it is logged in on our browser site.

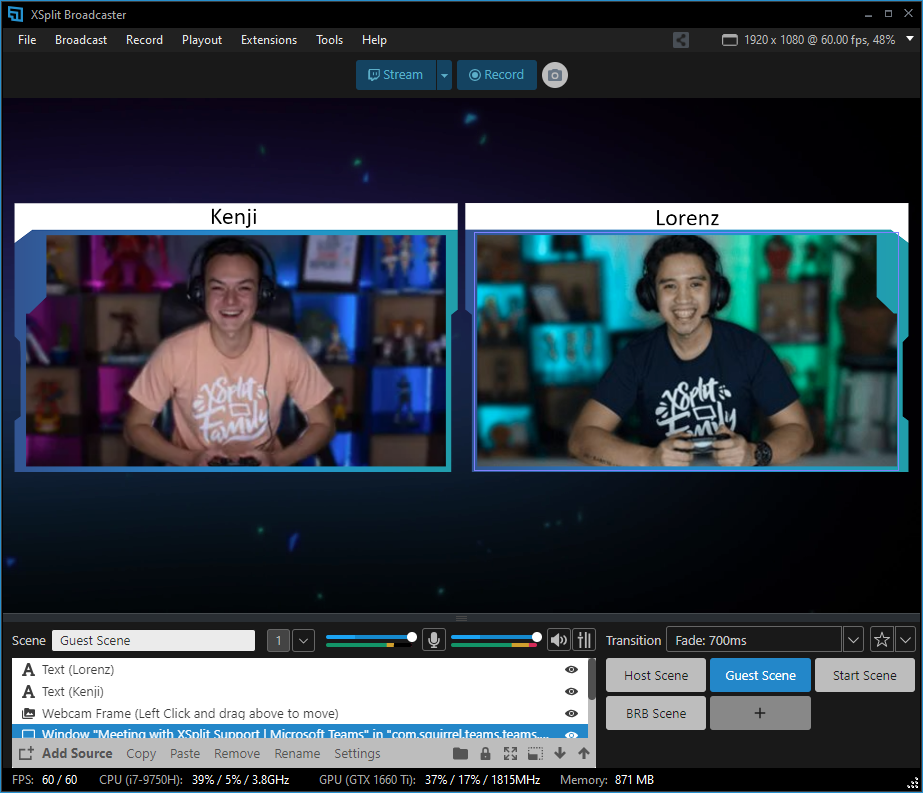
Set Up Your Presentation
Now, you’ll be brought to the main XSplit Broadcaster window. Here, you can add sources, which are anything that you want to present in your stream or recording such as your game, overlays, or Twitch widgets. You can learn more about adding Sources by clicking here.
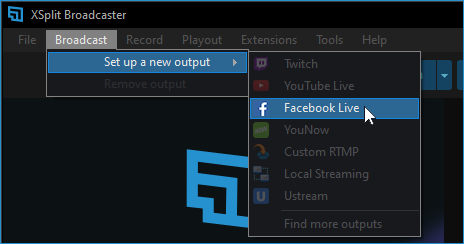
Set Up a Facebook Output
After your sources are ready, let’s now set up your Twitch broadcast output. Go to the Broadcast menu, and select Set up a new output, then click Facebook Live.
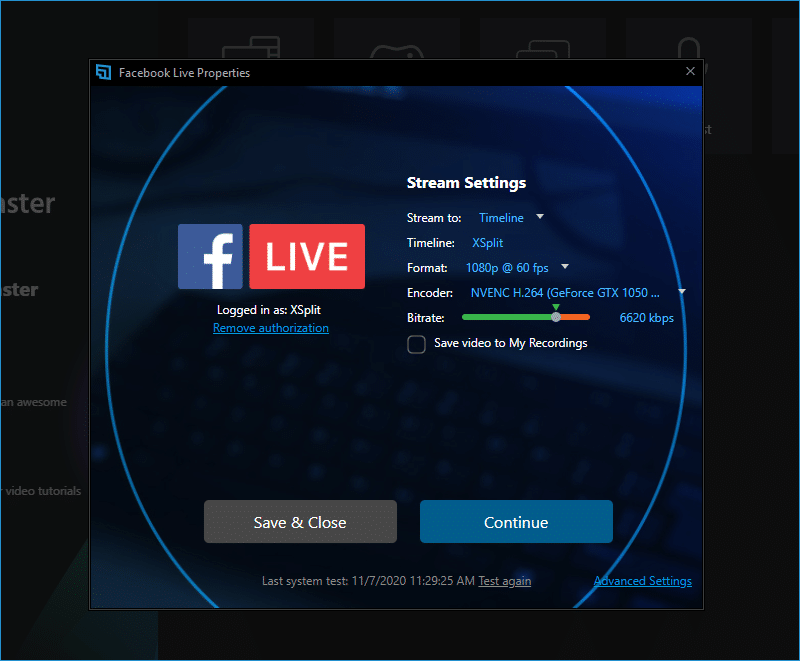
Upon authentication and allowing permissions to your Facebook account, this will open your Stream Settings where you can choose whether to stream to your profile timeline or public page, set the resolution format and bitrate, your encoder.
Start your Facebook Livestream
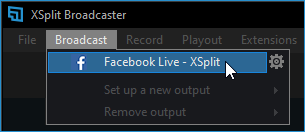
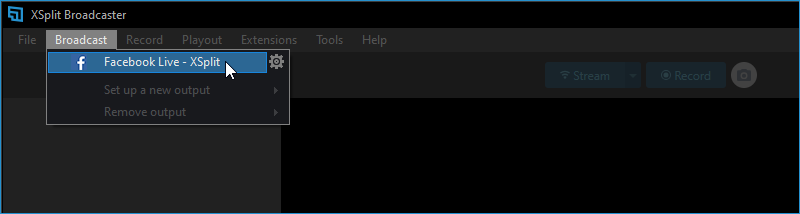
You’re now ready to start a stream. Go to the Broadcast menu again and select your created Facebook output.
This will open Facebook's Broadcast Details, which is your way to create the title, description, and other details for your Facebook Live post. Click the Start broadcast to go live.

Easy Setup Properties
Stream to
Choose whether to broadcast to timeline or page.
Page
Choose which page you are streaming to.
Format
Set your preferred resolution and frame rate for your stream.
Encoder
Select which codec will be used as an encoder.
Bitrate
Set the bitrate for your broadcast. Set it within the green bar as recommended.
Save video to My Recordings
Allows you to save a video recording of your last live broadcast.
Advanced Settings
Username
For your Facebook username, click the Authorize button to register the details.
Post On
Choose whether to post your live video on your timeline or a page you manage.
Post As
Choose whether to post your live video using your profile, or as a page you manage depending on which type of Post On you have selected.
Manage scheduled live videos
See below for more information about Scheduled Live Videos.
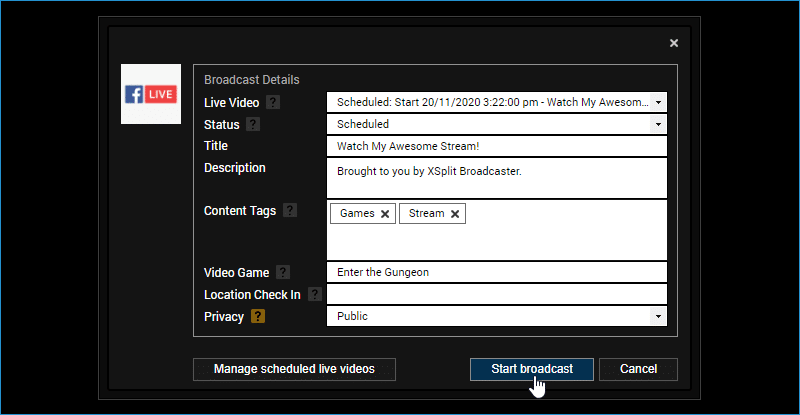
Broadcast Details
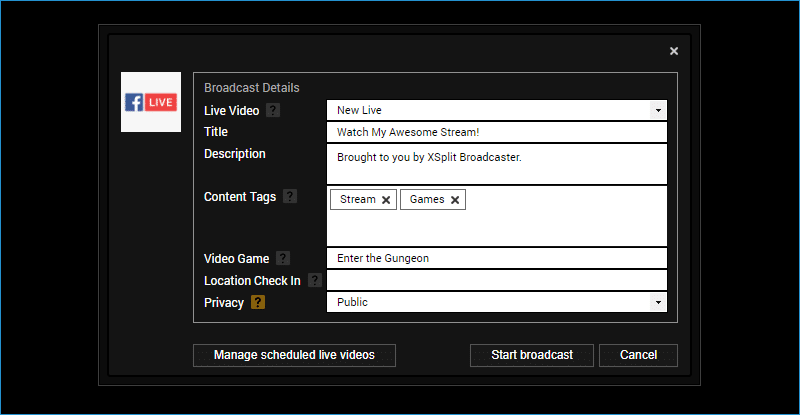
Live Video
Choose whether to go live with a New Live or select an existing Scheduled live video post.
Title
Sets a title for the video. Must be less than 255 characters.
Description
Add text that will appear on the Facebook post for your stream.
Content Tags
Adds content tags that will make your video more discoverable. They are not visible to the public.
Video Game
Tag the title of the video game you are playing on stream for Facebook Gaming.
Location Check In
Adds the location where you are streaming from.
Privacy
Choose whether your livestream is visible to the public, your friends only or only yourself. This option is only available when posting to your own timeline.
Manage scheduled live videos
See below for more information about Scheduled Live Videos.
Start broadcast
Click to start broadcasting live on Facebook.
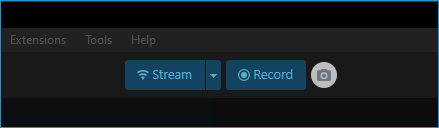
Alternatively, you can also start your stream by clicking on the Stream button at the top bar section of Broadcaster.
A red status bar should appear at the top of the XSplit Broadcaster application window showing that you’re live.
Scheduling a Facebook Live Broadcast
A scheduled livestream post for Facebook Live can be used to generate anticipation and hype for your audience or for testing recurring programmed content.
Creating a Scheduled Facebook Live post
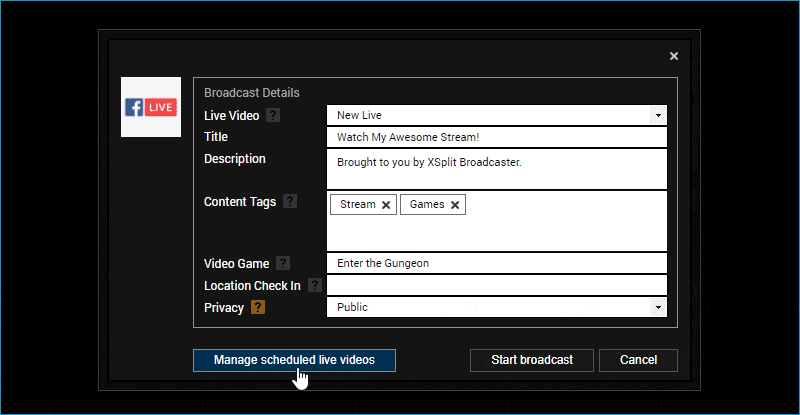
- On your Facebook Live Broadcast Details, click Manage scheduled live videos.
- Fill in the stream details, then click Add Schedule.
- Select your Scheduled Start date and time. This must be scheduled between 10 minutes and 7 days (163 hours) from when you create the post.
- Optionally add a Custom Image that will appear on your Facebook post. If you do not add a custom image, your profile or page’s picture will be used instead.
- Click Create Scheduled Live to finish and you will be prompted that you have successfully created a Scheduled Live post.
- Once created your scheduled live post will be posted on your Facebook wall. (You can edit your scheduled live post by clicking on Edit Schedule on the broadcast details.)
Starting a Scheduled Facebook Live post
- Go to Broadcast and click the Facebook Live profile you have set.
- On the Broadcast Details prompt, select your scheduled Live Video.
- Click Start broadcast.
Updated on: 10/11/2025
Thank you!