Single sign-on (SSO) with OneLogin
XSplit's Team License Manager allows owners to set up Single sign-on (SSO) through OneLogin to simplify the sign-in process for their domain license users.
Prerequisites
You will need the following to set up SSO with OneLogin:
- The Manager role for your company's XSplit Team License. If you are not the owner of the domain license, the owner can enable this for your account.
- A verified domain in Team License Manager's domain settings.
- Administrator access on your company's OneLogin instance.
Step 1: Preparing SSO setup in XSplit Team License Manager
- Go to your Team License Manager dashboard by clicking on the Team License Manager link under My Account.
- Go to your Domain Settings by clicking on Domain License then Domain Settings.
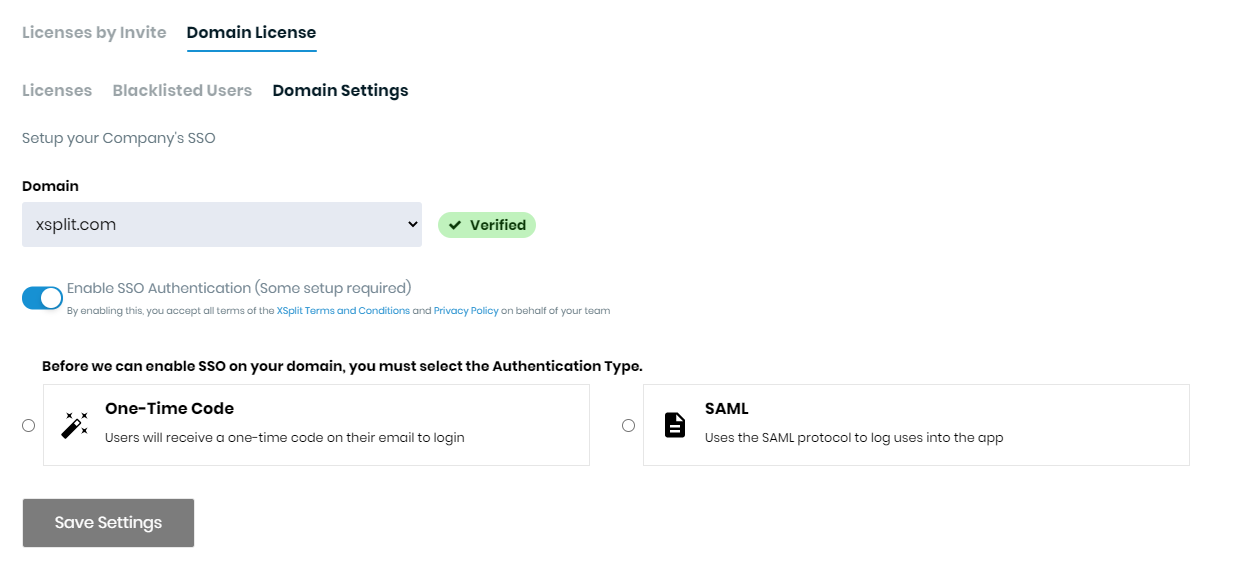
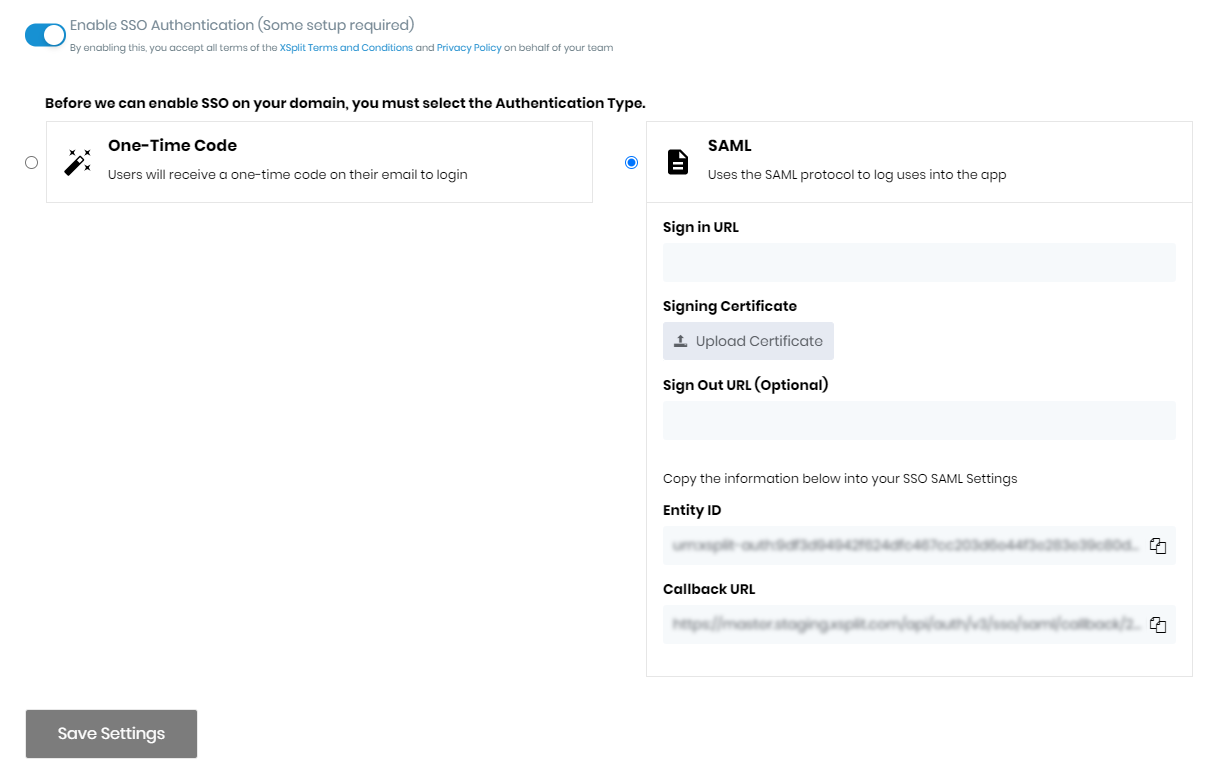
- Select SAML as your Authentication method. Keep this tab open, as you’ll be using the information here to set up OneLogin integration.
Step 2: Adding the XSplit Application in OneLogin
- Go to your OneLogin account then select Applications.
- Click on Add App on the top-right then select SAML Test Connect (Advanced).
- Under Info, change the Display Name to
XSplit. You can also change the icon, give the application a description and/or choose to have it visible in the portal.
- Click Save on the top-right then select the Configuration tab on the left.
- You will need to enter information from the XSplit Team License Manager's Domain settings into OneLogin's Application details:
- Copy and paste the Callback URL from XSplit into both ACS (Consumer) URL Validator and ACS (Consumer) URL on OneLogin.
- Copy and paste the Entity ID from XSplit into Audience (Entity ID) on OneLogin.
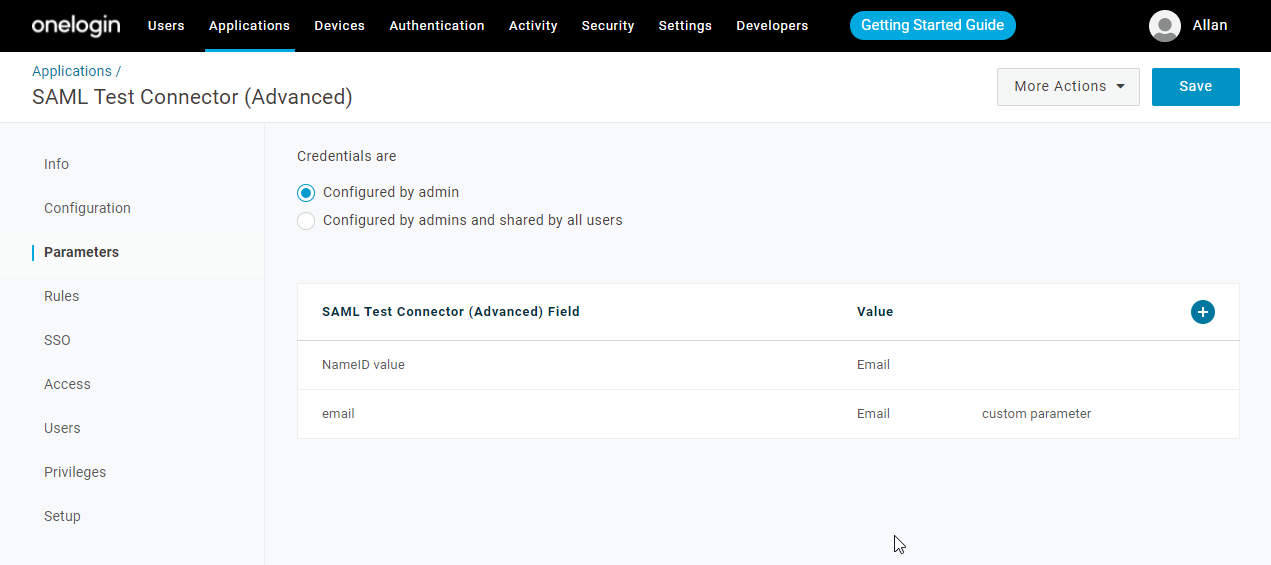
- Click Save on the top-right then select the Parameters tab on the left.
- Click on the + button on the right of SAML Test Connector (Advanced) Field to create a new attribute with the field name
email. Set the value asEmailand uncheck Include in SAML assertion.
- Click Save on the top-right then select the SSO tab on the left.
- Select SHA-256 as the SAML Signature Algorithm.
- Copy and paste the SAML 2.0 Endpoint (HTTP) URL from here into the Sign In URL on XSplit.
- Click View Details under X.509 Certificate then download the certificateand upload it into the Signing Certificate on XSplit.
- Click Save on the top-right then select the Users tab on the left. Select to give users access.
- Click Save on the top-right to complete adding the app.
Updated on: 12/08/2022
Thank you!