Single sign-on (SSO) using Microsoft Azure
XSplit's Team License Manager allows owners to set up Single sign-on (SSO) through Microsoft Azure to simplify the sign-in process for their domain license users.
Prerequisites
You will need the following to set up SSO with Microsoft Azure:
- The Manager role for your company's XSplit Team License. If you are not the owner of the domain license, the owner can enable this for your account.
- A verified domain in Team License Manager's domain settings.
- Administrator access on your company's Azure instance.
1. Preparing SSO setup in XSplit Team License Manager
- Go to your Team License Manager dashboard by clicking on the Team License Manager link under My Account.
- Go to your Domain Settings by clicking on Domain License then Domain Settings.
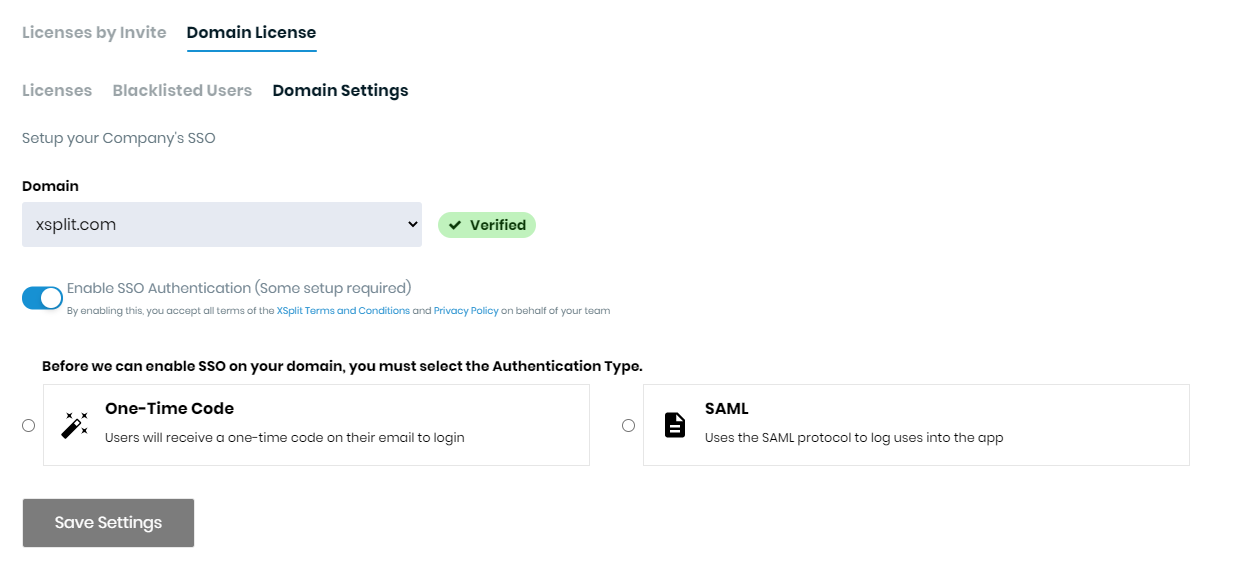
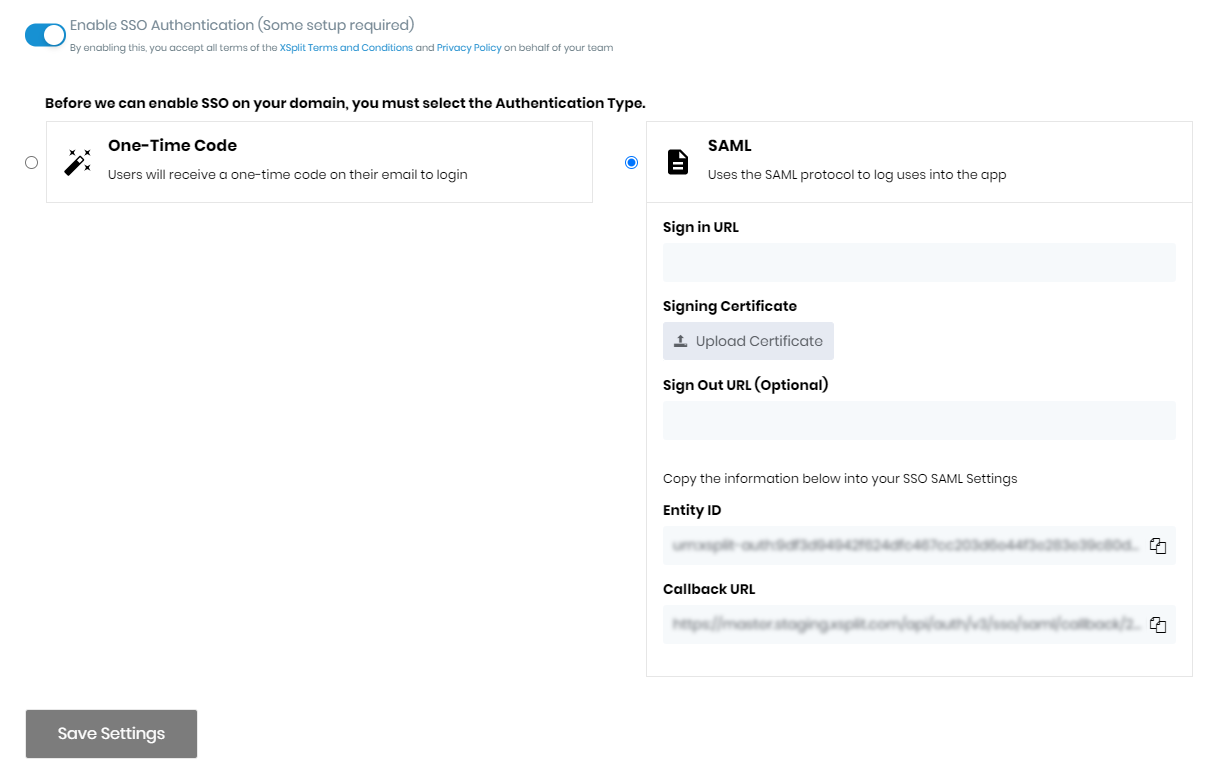
- Select SAML as your Authentication method. Keep this tab open, as you’ll be using the information here to set up Azure integration.
2. Adding the XSplit Application in Microsoft Azure
- Go to your Azure portal and sign in as an administrator with sufficient rights to manage Enterprise Applications.
- Click New Application then click on Create your own application on the top-left.
- Select Integrate any other application you don't find in the gallery. Set the Name to
XSplitthen click Create.
- Select on XSplit from the list of All applications then click on the Users and groups on the left.
- Click on Add user at the top, select the users you want to add then click Assign.
- Click on the Single sign-on on the left then select SAML.
- You will need to enter information from the XSplit Team License Manager's Domain settings into Azure:
Click Edit on the section labeled Basic SAML Configuration.
- Copy and paste the Callback URL from XSplit into both Reply URL (Assertion Consumer Service URL) on Azure.
- Copy and paste the Entity ID from XSplit into Identifier (Entity ID) on Azure.
Click Edit on the section labeled 2. User Attributes & Claims.
Click Add new claim
- Set Name to email
- Set Source to Attribute
- Set Source attribute to user.mail
- Save changes

- Click on SAML-based sign-on on top.
- Scroll down to the section 3. SAML Signing Certificate and download Certificate (Base64).
- Scroll down to the section 4. Setup XSplit then copy the Login URL.
3. Finalizing SSO setup in XSplit domain settings
- Switch back to XSplit Team License Manager's Domain settings then;
- Paste the Login URL from Azure into Sign In URL on XSplit.
- Upload the downloaded certificate to the Signing Certificate on XSplit.
- Click Save Settings to enable SSO for your domain
Updated on: 12/08/2022
Thank you!