Single sign-on (SSO) using Okta
XSplit's Team License Manager allows owners to set up Single sign-on (SSO) through Okta to simplify the sign-in process for their domain license users.
Prerequisites
You will need the following to set up SSO with Okta:
- The Manager role for your company's XSplit Team License. If you are not the owner of the domain license, the owner can enable this for your account.
- A verified domain in Team License Manager's domain settings.
- Administrator access on your company's Okta instance.
1. Preparing SSO setup in XSplit Team License Manager
- Go to your Team License Manager dashboard by clicking on the Team License Manager link under My Account.
- Go to your Domain Settings by clicking on Domain License then Domain Settings.
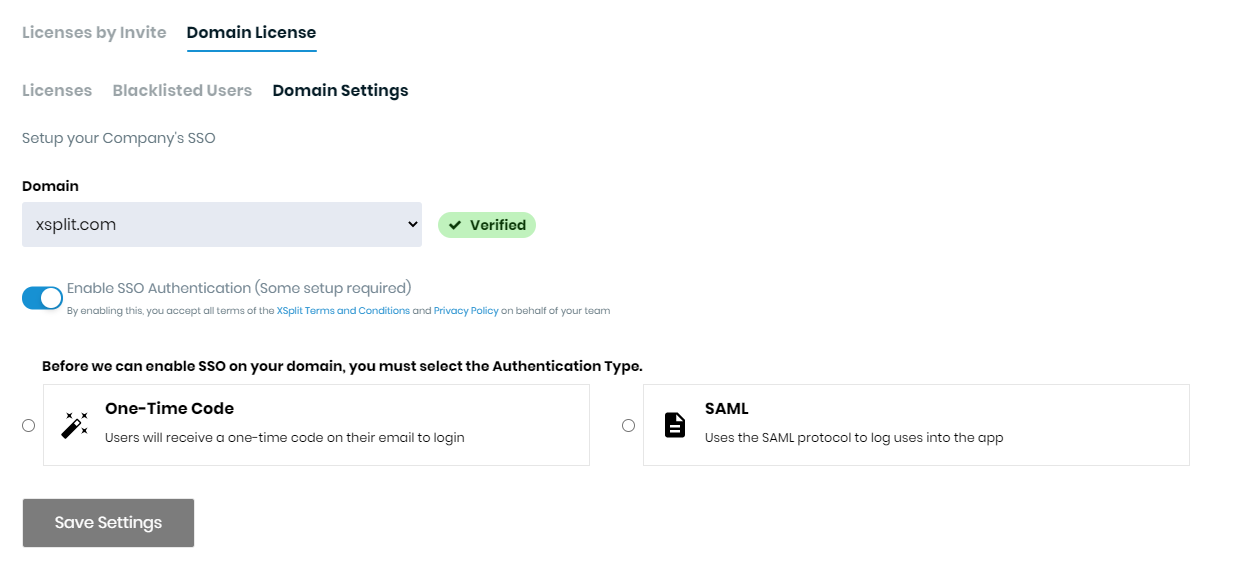
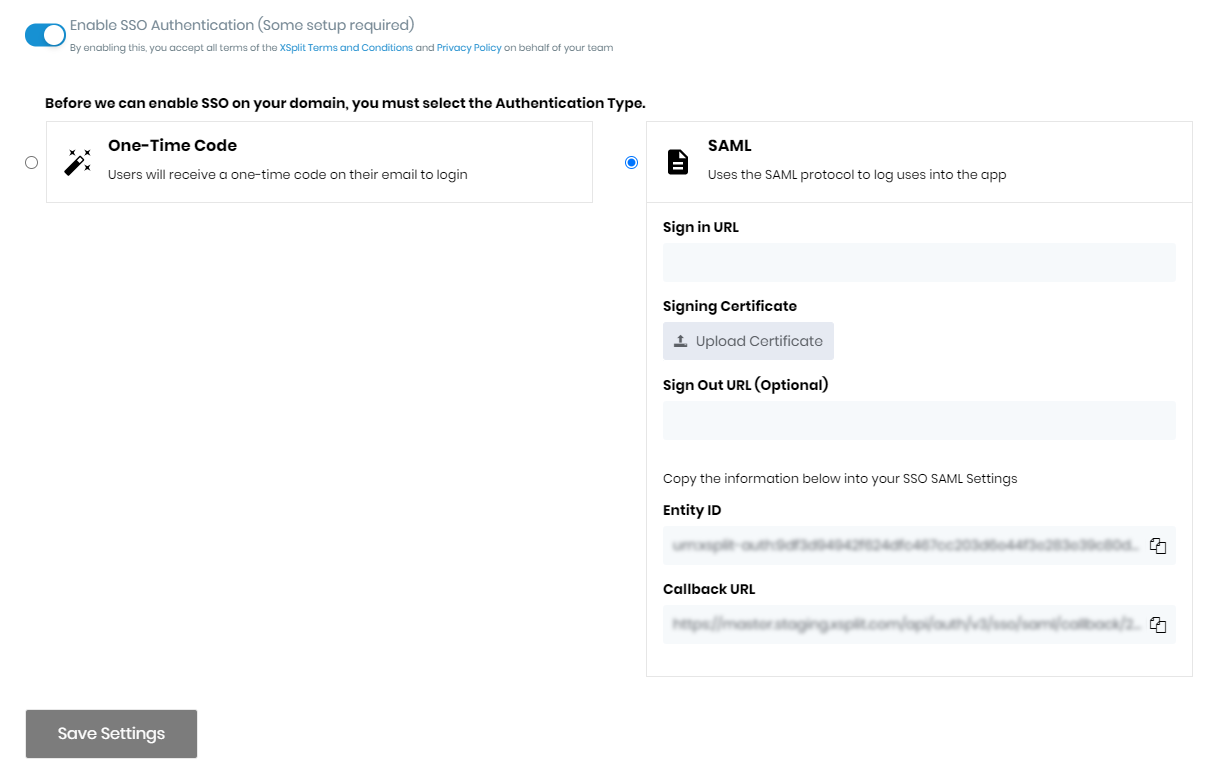
- Select SAML as your Authentication method. Keep this tab open, as you’ll be using the information here to set up Okta integration.
2. Creating the XSplit Application in Okta
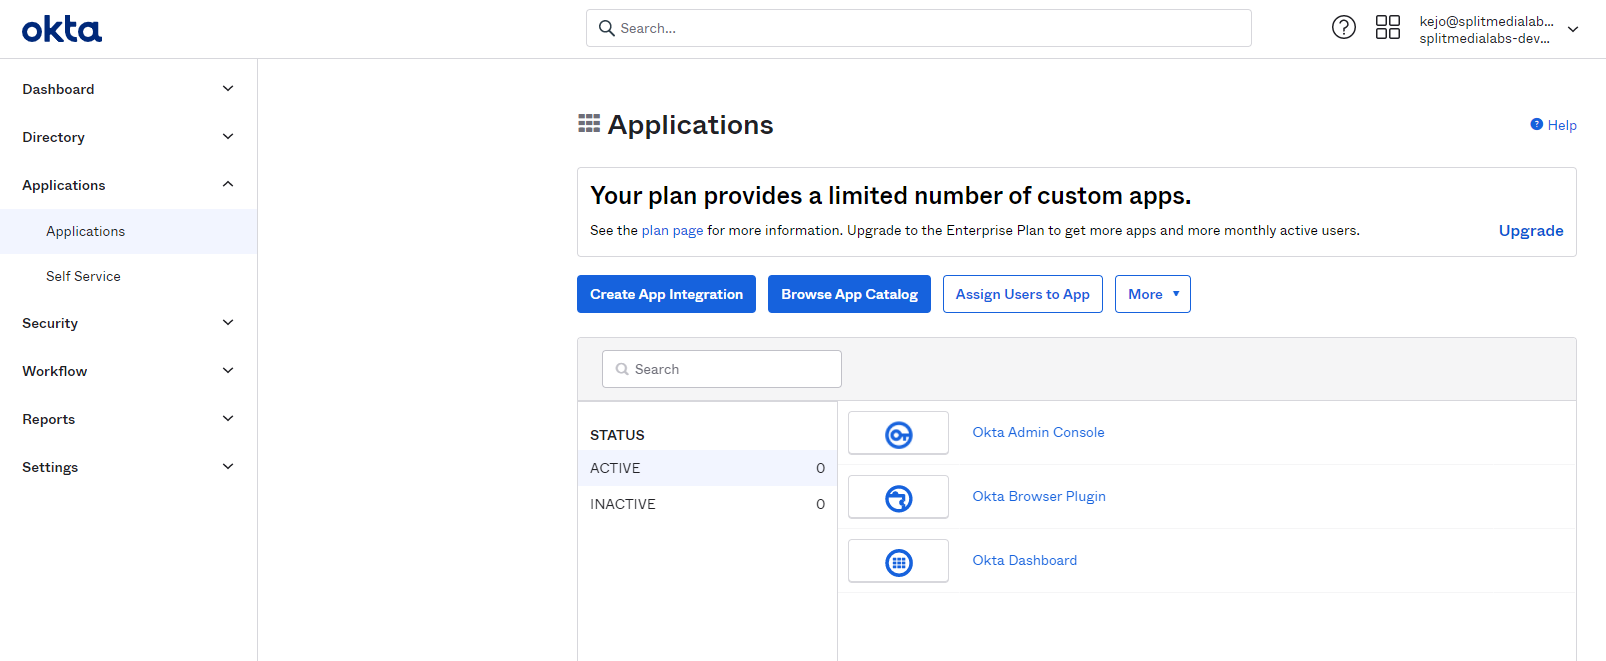
- Go to your Okta admin portal then select the Applications tab.
- Click on Create App Integration.
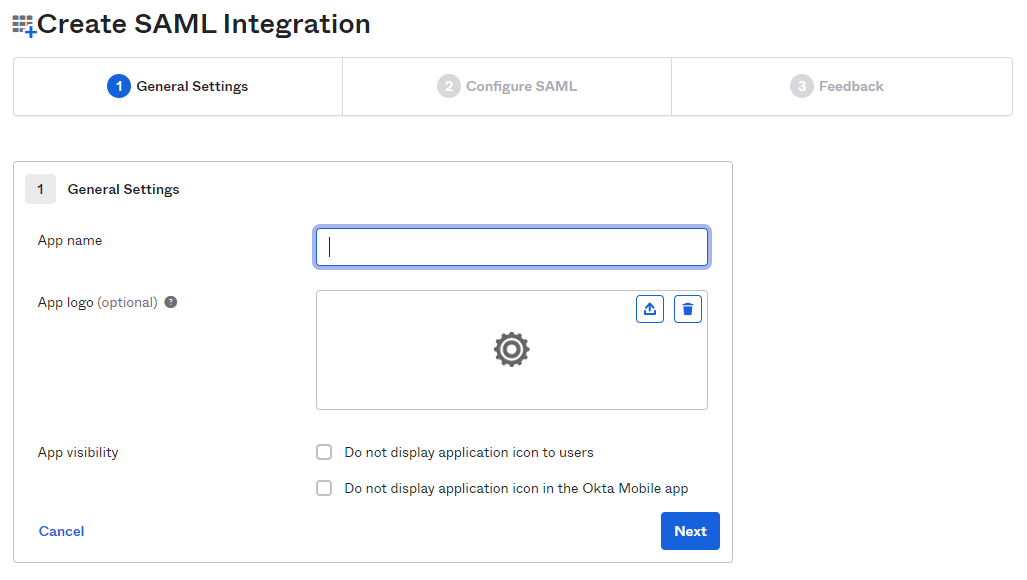
- Select SAML 2.0 as the Sign-on method.

- Under General Settings, enter
XSplitas the App name (or anything you want).
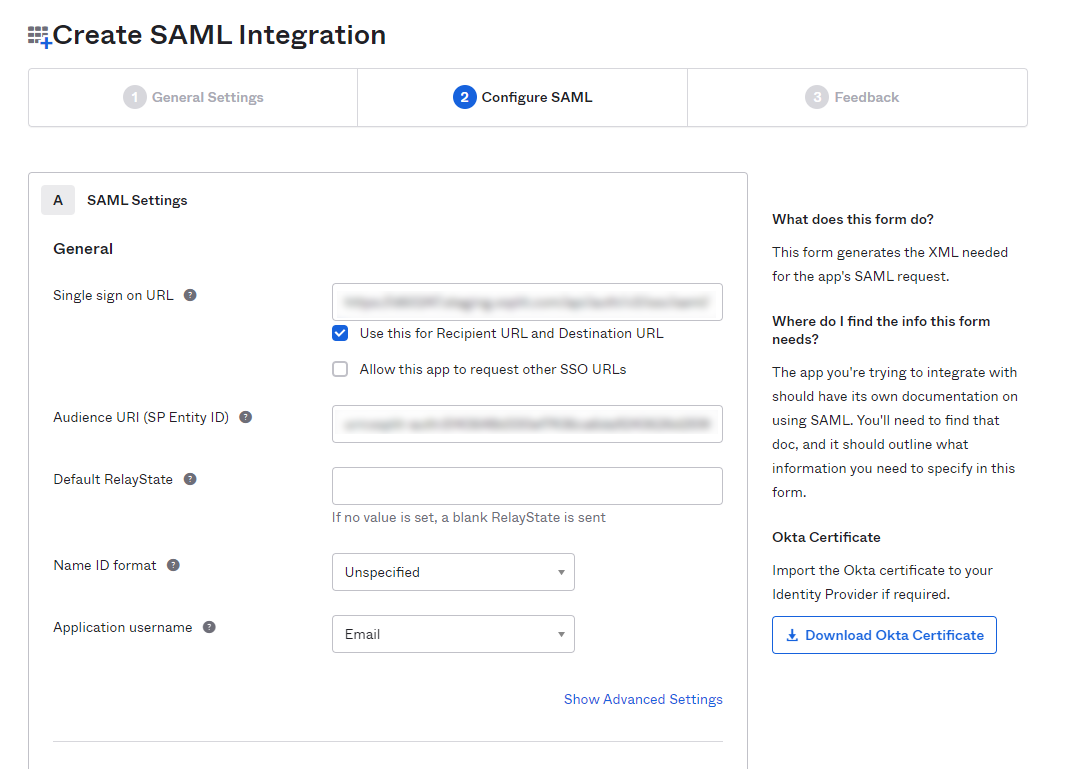
- On Configure SAML, you'll need to copy and paste information from the XSplit Domain settings into the SAML Settings section:
- Copy and paste the Callback URL from XSplit into Single sign on URL on Okta.
- Copy and paste the Entity ID from XSplit into Audience URI (SP Entity ID) on Okta.
- For Name ID format, choose
EmailAddress.
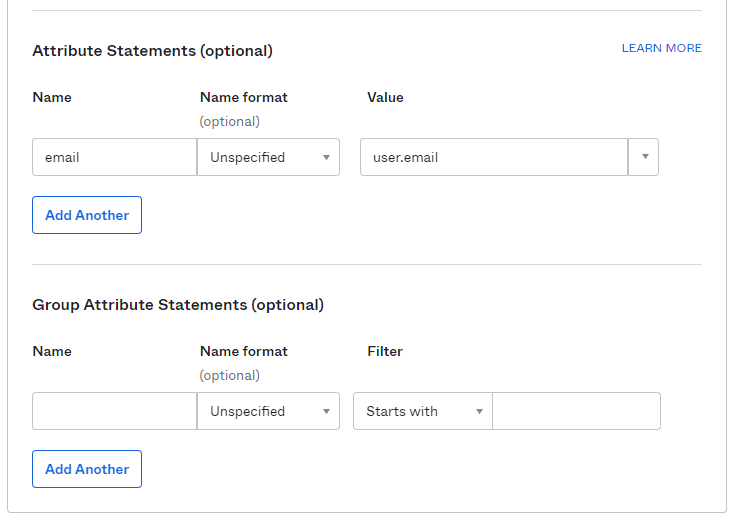
- Scroll down to Attribute Statements in Okta.
You will need to map out the following fields:
- For
email, map to the value within your company’s Okta setup.
- For
first_name, map to the value within your company in Okta.
- For
last_name, map to your company’s Okta value as well.
- Click Next. You can enter anything on the Feedback form, the information entered here will not impact the XSplit integration.
- Click Finish .
3. Finalizing SSO setup in XSplit domain settings
Once the XSplit app integration is done in Okta, you will need to enter information from Okta into the XSplit Team License Manager's Domain settings:
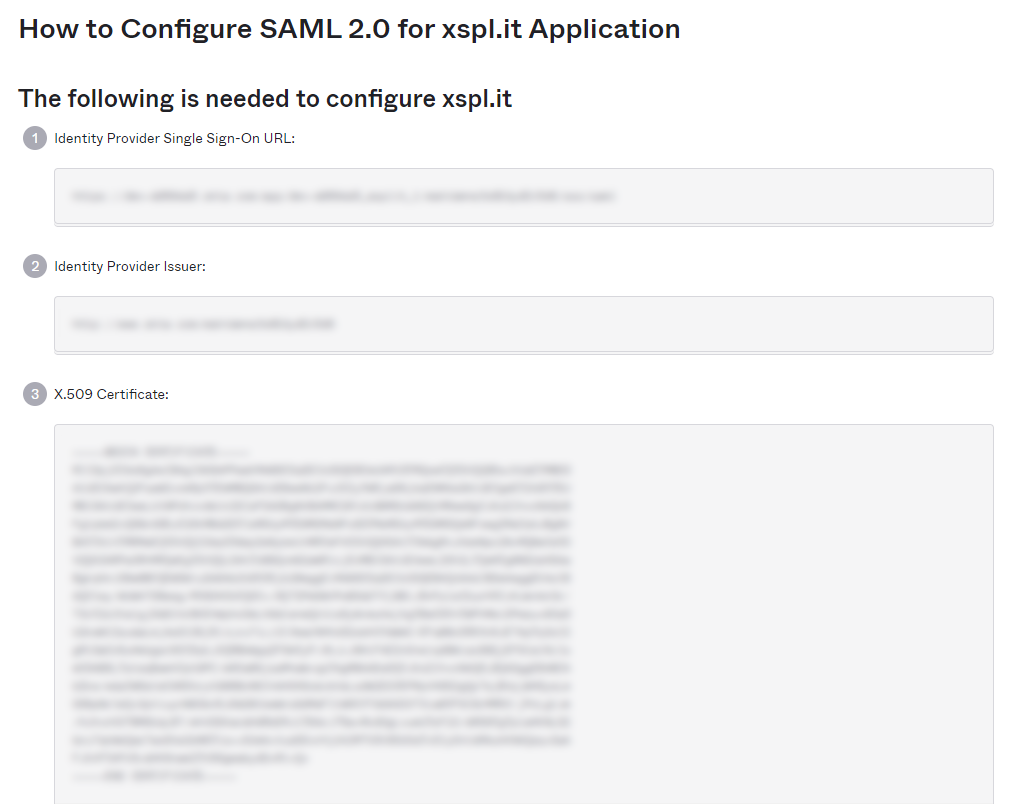
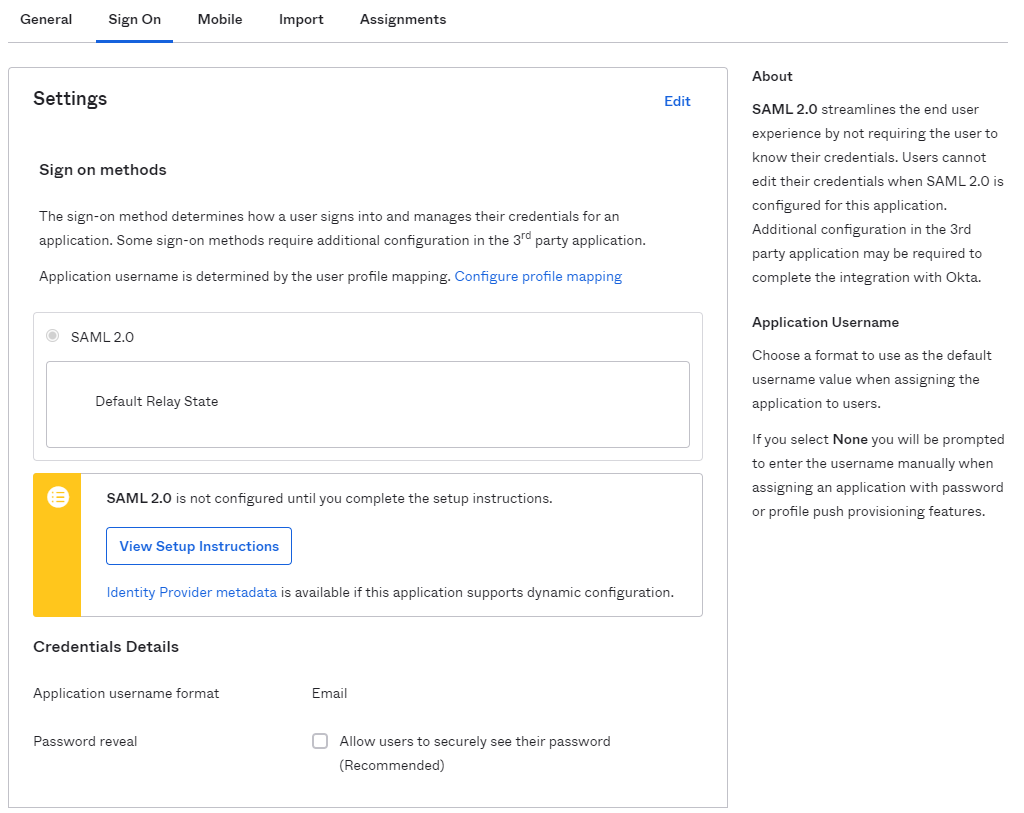
- On Okta, go to the Sign On tab then click View Setup Instructions under SAML 2.0.
- Copy and paste the Identity Provider Single Sign-On URL from Okta into the Sign In URL on XSplit.
- Download the X.509 Certificate from Okta and upload it into the Signing Certificate on XSplit.
- Click Save Settings to enable SSO for your domain.
Updated on: 15/10/2025
Thank you!