SCIM Integration with OKTA
- Make sure SCIM is enabled in your XSplit Account's Team License Manager. To do this:
- Go to your XSplit Account's Dashboard, then select Authentication under Team.
- Select the desired domain
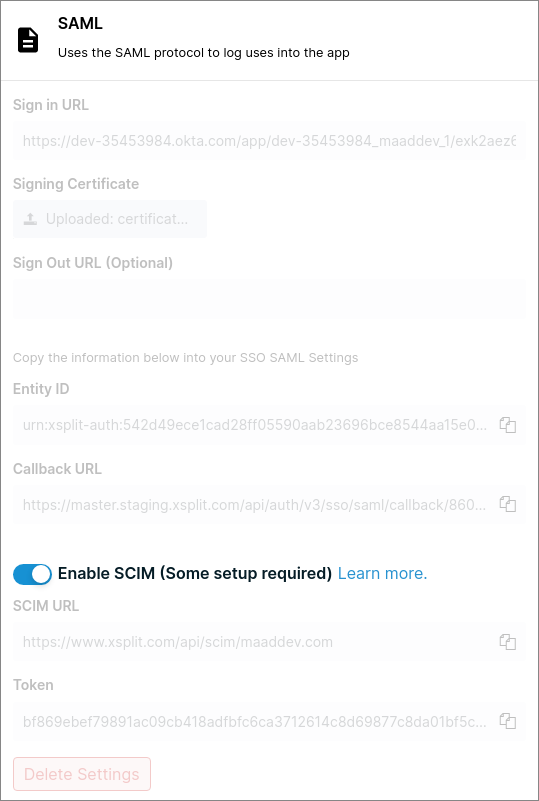
- At the bottom of SAML setting make sure SCIM is Enabled.
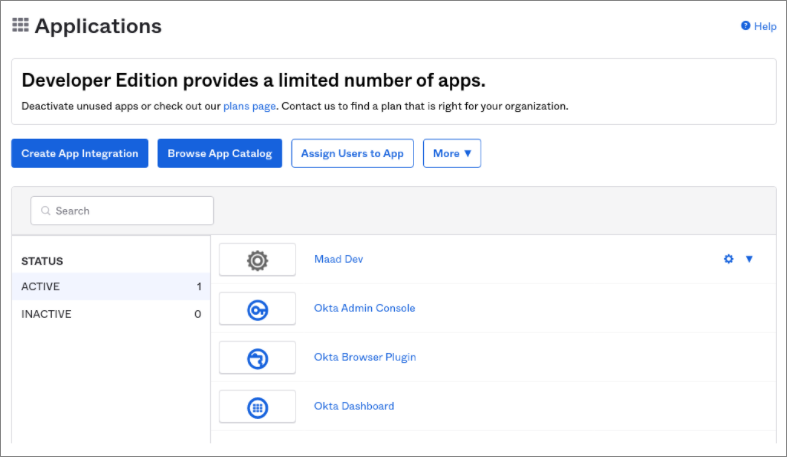
- Go to Okta admin portal > Applications, then select your application.
- In the General tab, click Edit under App Settings.
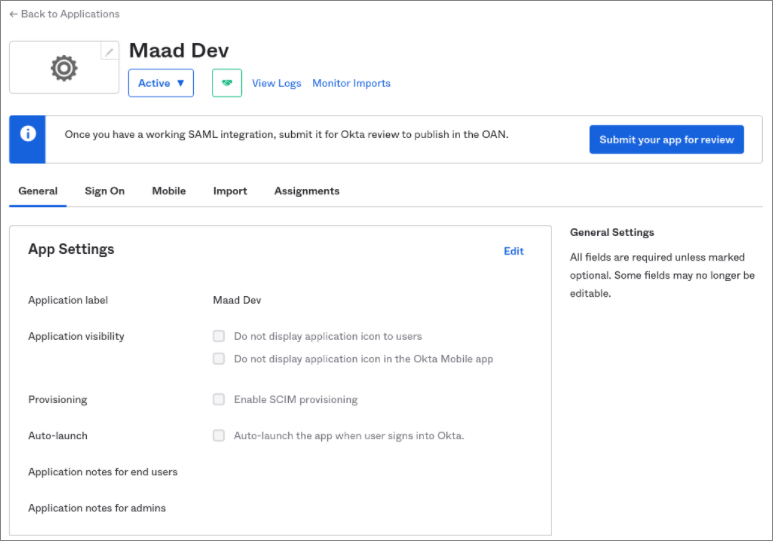
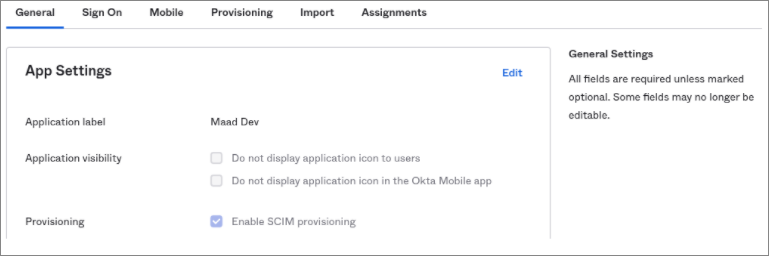
- Check Enable SCIM provisioning, then hit the Save button. Doing so will enable and show Provisioning in the menu.
- In the Provisioning menu, click Edit. You'll need to grab some information from XSplit so you can input these in Okta.
- Tick/Check Push Users and Push Profile Updates
- Paste the SCIM URL from XSplit, into the SCIM connector base URL field in Okta.
- Put email into Unique identifier field for users field in Okta
- For Authentication Mode select HTTP Header
- Once done, paste the Token from XSplit into the Authorization field on Okta.
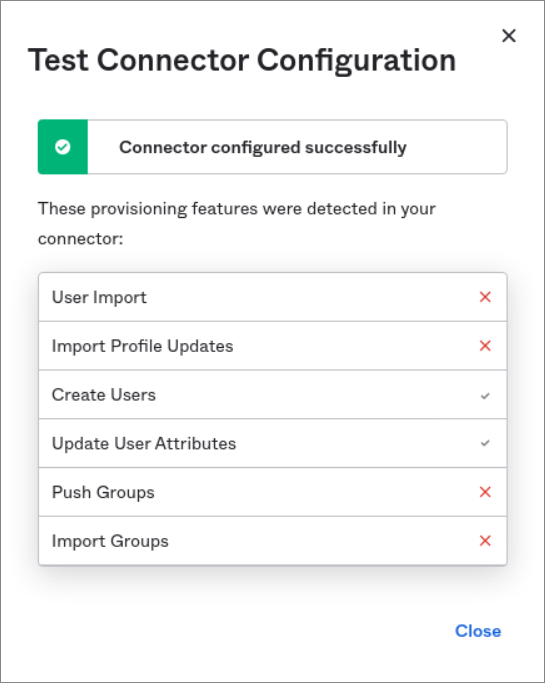
- The Test Connector Configuration will confirm if everything is configured successfully. Create Users and Update User Attributes should be checked.
- Click save/close afterwards.
- After saving, it will display the Provisioning to App configuration. click Edit and check Create User and Deactivate Users.
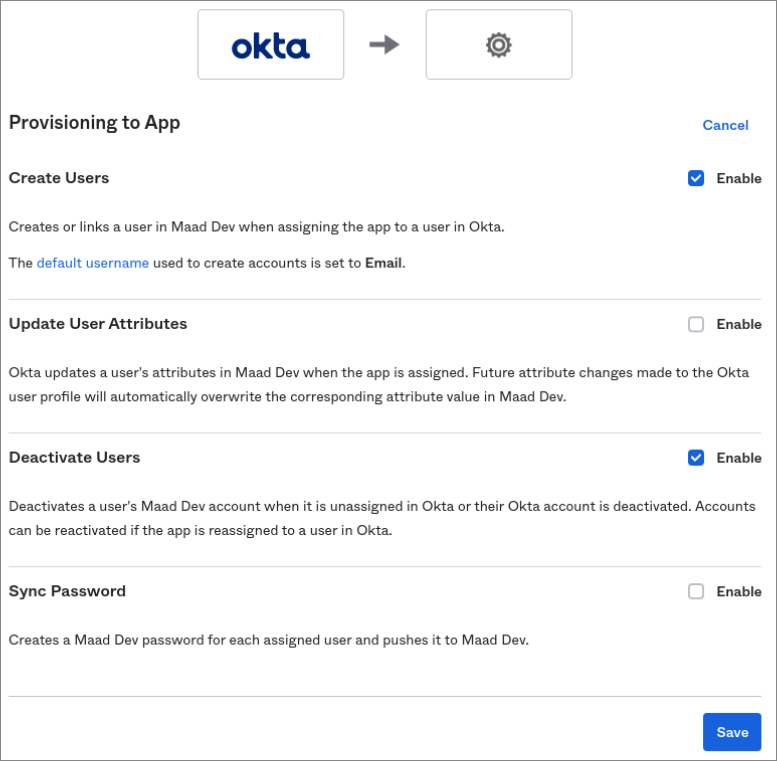
- Click Save once done.
Updated on: 15/10/2025
Thank you!