SCIM Integration with Azure AD
- Make sure SCIM is enabled in your XSplit Account's Team License Manager. To do this:
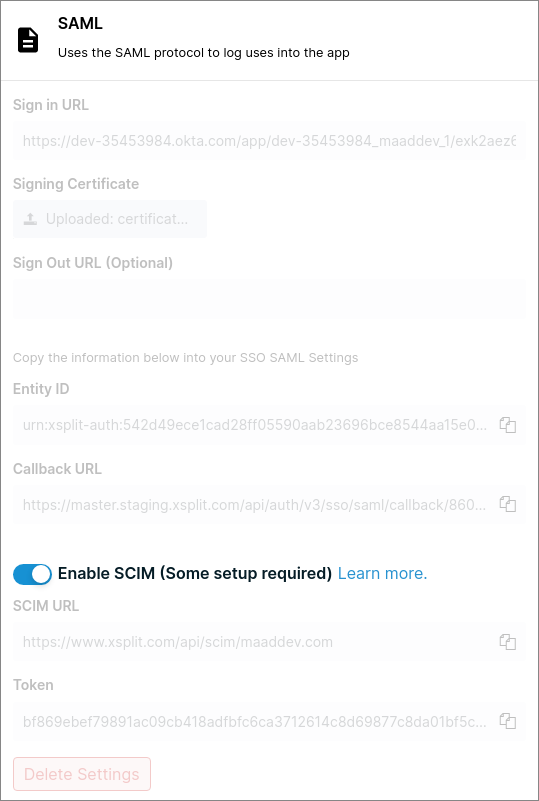
- Go to your XSplit Account's Dashboard, then select Authentication under Team.
- Select the desired domain
- At the bottom of SAML setting make sure SCIM is Enabled.
- Go to Microsoft Azure dashboard, then select your application.

- In the Enterprise Applications, select the application to be used.

- Click on Provisioning under Manage. ****

- Start the Provisioning setup by clicking "Get started", set provisioning mode to Automatic. ****


- Paste the SCIM URL from XSplit, into the Tenant URL field in Azure - Provisioning Setup.
- Paste Token from XSplit into Secret Token field in Azure - Provisioning Setup.
- Click Test Connection to confirm if everything is configured successfully.

Updated on: 15/10/2025
Thank you!