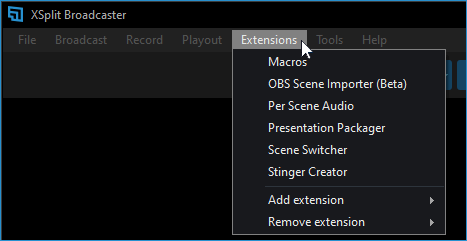
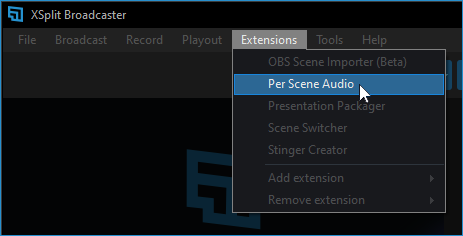
Extensions Menu
Extensions are small programs that add features and expands XSplit Broadcaster’s capabilities.
You’ll be able to access them via Extensions menu on XSplit Broadcaster.
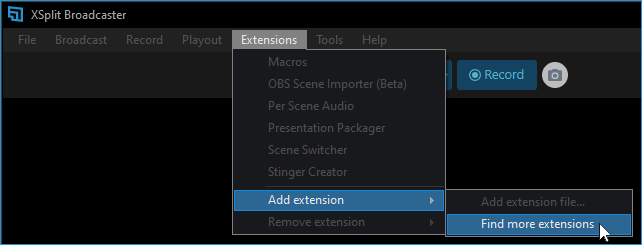
If any of the extensions listed here do not appear under the Extensions menu, go to Add Extension, then Find more extensions to launch the Plugin Store.
Macros
The Macros extension allows you to automate actions for your presentation – such as scene switching or showing/hiding sources through a keypress and even starting your broadcast or recording during a set time.
You’ll be able to access it by going to Extensions then selecting Macros.
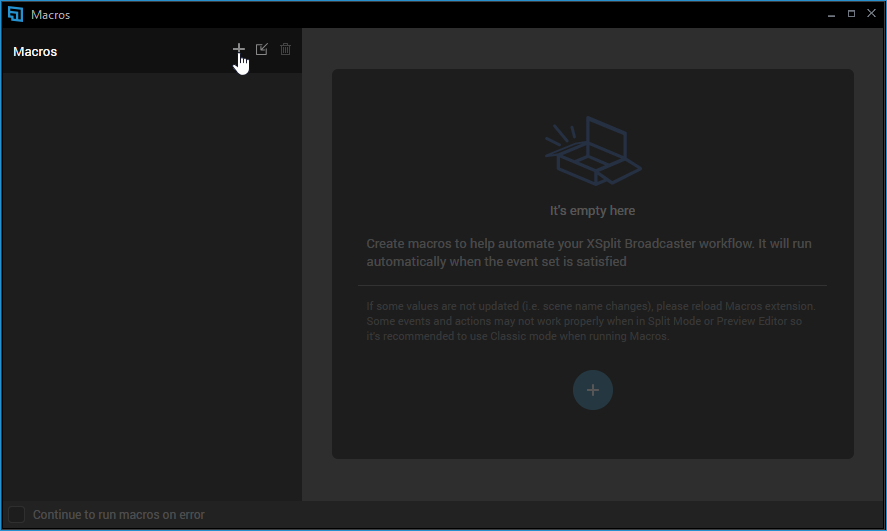
Creating Macros
- Click the Add icon to create a new macro.
- You can rename your macros by clicking the Pencil icon.
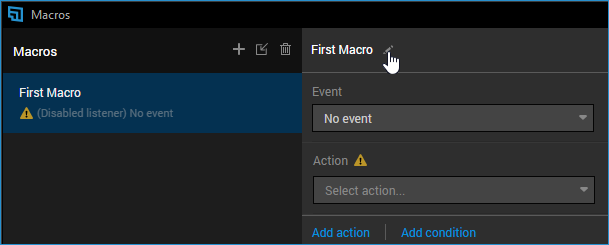
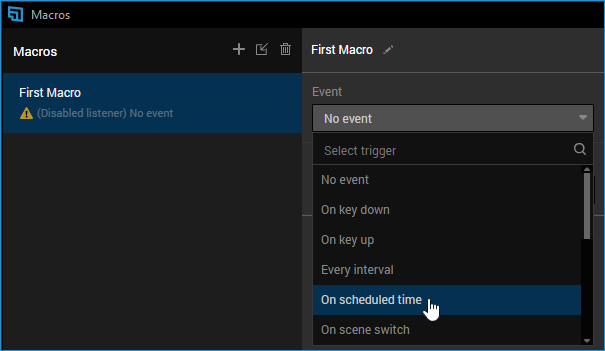
- Select the Event that will trigger the macro from the drop-down menu. Additional drop-down menus will appear depending on your selected event.
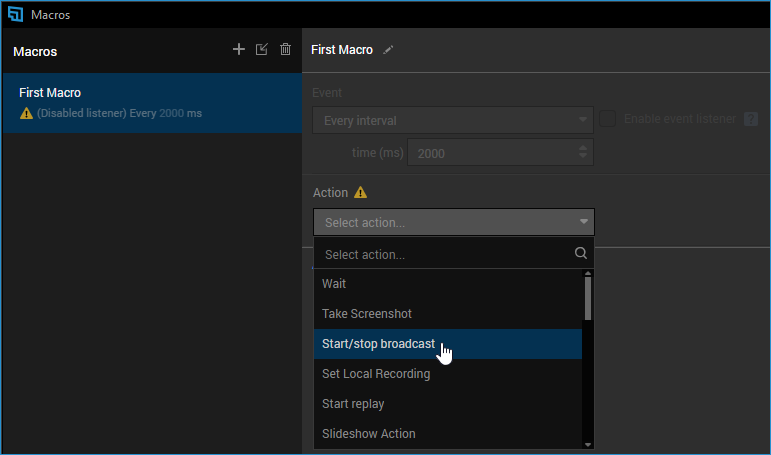
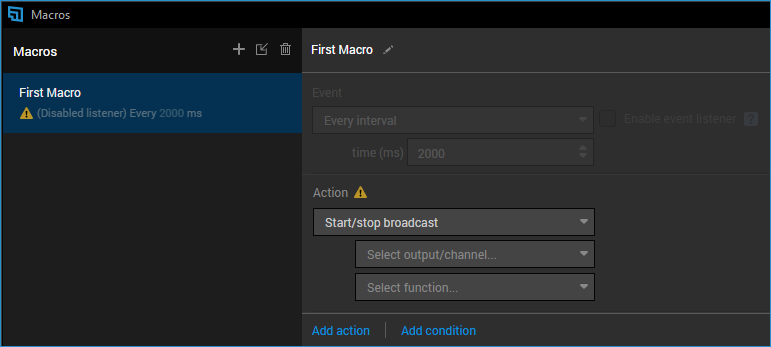
- Select an Action to perform from the drop-down menu. Additional drop-down menus will appear depending on your selected action.
- ClickingAdd Action or Add Condition will add another action or condition to the macro that will run after the previous one.
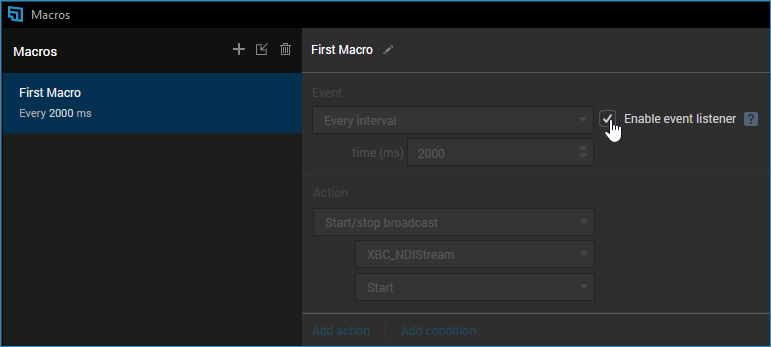
- Once you’re done, click Enable Event Listener. This will make the extension continuously check if the event conditions are satisfied then execute the actions sequentially.
For examples of how you can use macros, visit this blog post:
How to use Macros in XSplit Broadcaster
Events
On key press
Triggers the macro when the key or mouse click combination set is pressed similar to Hotkeys.
Every interval
Triggers the macro at every time interval set in milliseconds.
On scheduled time
Triggers the macro at the set hour.
On scene switch
Triggers the macro when the selected scene becomes active.
When a stream source goes online/offline
Triggers the macro when the selected stream source in a scene goes online or offline. Works with RTMP, RTSP and NDI stream sources.
When a media source stops
Triggers the macro when a specific media source stops.
Custom Script
See the Custom Script section below.
Actions
Wait
Waits for a time interval before going to the next action.
Start/stop broadcast
Starts or stops one of your streaming outputs, Local Streaming or Local Recording.
Switch to scene
Switches to a specific scene in your presentation.
Set scene transition
Sets a specific scene’s transition. Also supports Stingers.
Set source visibility
Shows, hides or toggles the visibility of a specific source from a chosen scene. Note that source transitions are also triggered when a source is shown or hidden.
Set media source playback state
Plays, pauses or stops a specific media source. Works on both video and audio media sources.
Set source audio state
Mute or unmute a source’s audio output.
Run macro
Runs a different macro.
Stop macro
Stops a different macro.
Enable/Disable macro listener
Enable or disable another macro’s event listener.
Go to action
Go to another action in the same macro. Currently does not work with all available actions.
Custom Script
See Custom Script section below.
Custom Scripts
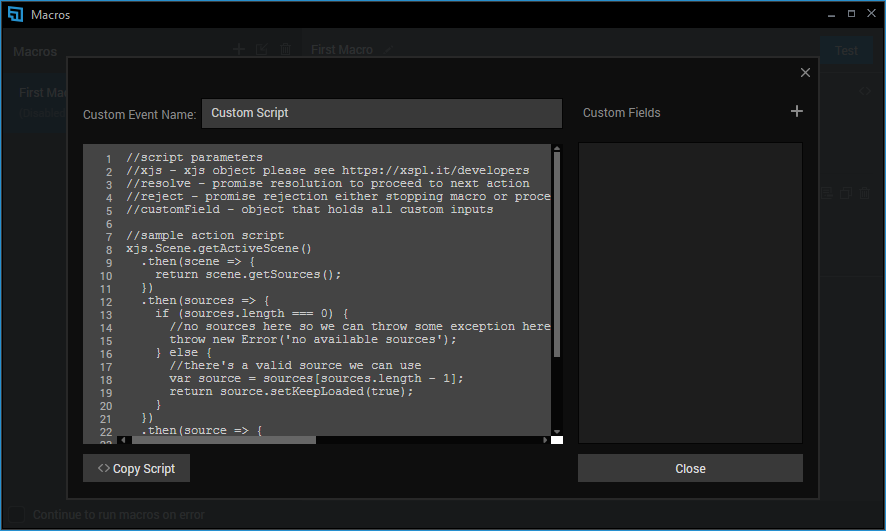
The Custom Script functionality for the Macros extension are still being changed and improved so documentation and guidelines for them are a work in progress. For now, you can experiment on modifying existing events and actions by clicking the to copy their scripts to the clipboard and pasting them to a custom script action.
Per Scene Audio
This extension allows you to create scene-specific audio profiles for your presentation. You can adjust the microphone and system audio level for each scene.
You’ll be able to access it by going to Extensions then selecting Per Scene Audio.
Use the Scene Selector drop-down to Add that you want to manage the audio. Each scene added will have their own system sound and microphone volume level adjustments. Scenes that you don’t add will use the audio levels set in Default.
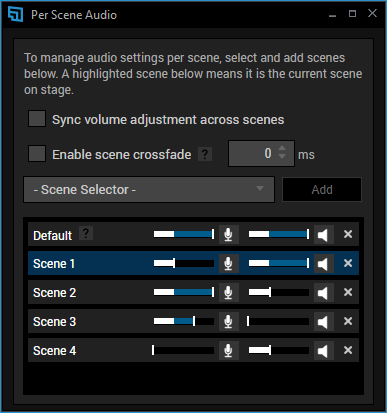
Sync volume adjustment across scenes
Enable this to have the volume levels for all scenes added (including Default) automatically match any volume adjustment done.
Enable scene crossfade
Enable this to have a crossfade effect when switching from one scene to another, making transitions for audio volume between scenes smoother.
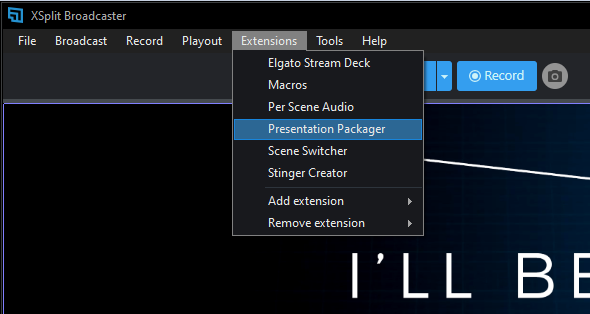
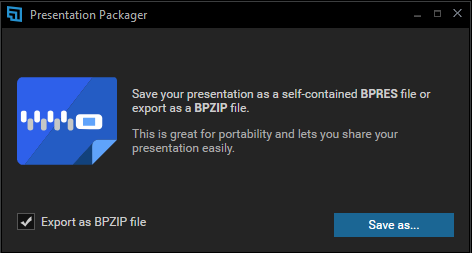
Presentation Packager
Presentation Packager allows you to save your XSplit presentation into a self-contained file which also contains the corresponding directory for each source. This is great for portability and easier sharing of your presentation to other users.
You'll be able to access it by going to Extensions then selecting Presentation Packager.
Exporting Presentations
- Click Save As….
Enabling Export as BPZip presentation will put the presentation files into a single compressed BPZip file . Otherwise, it will be exported as a BPres file along with a folder containing all the files used by the presentation.
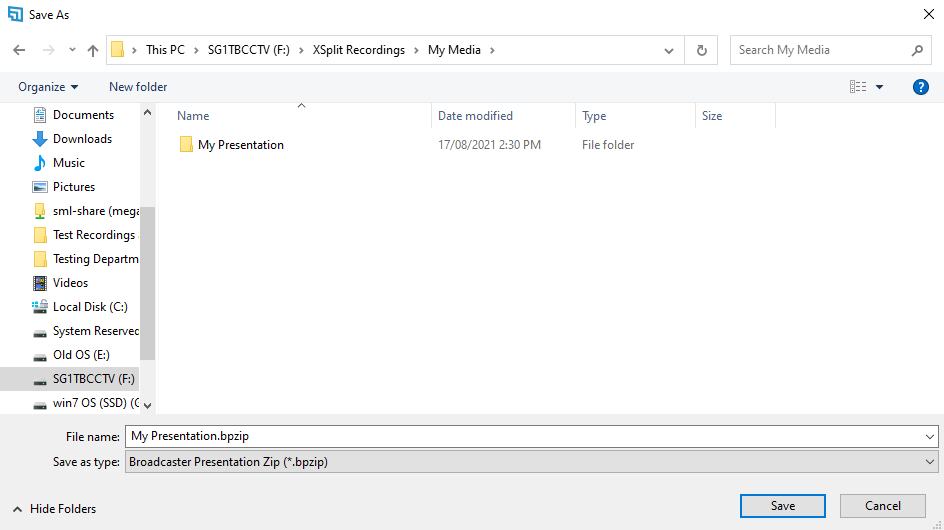
- Choose the filename and destination folder then click Save.
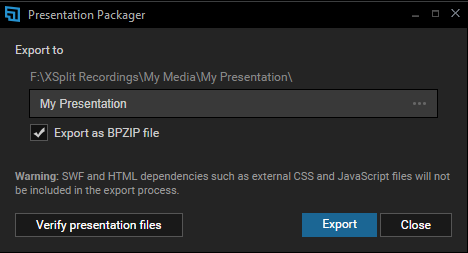
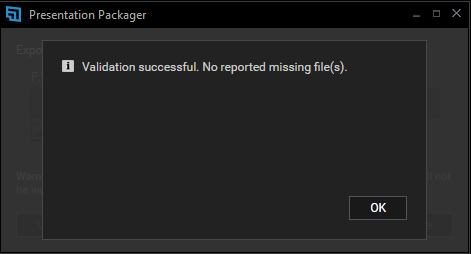
- Check if all the details such as the filename and destination are correct. You can also click on Verify presentation files to make sure that all the files used as sources can be loaded and exported. Once all details are correct, click on Export.
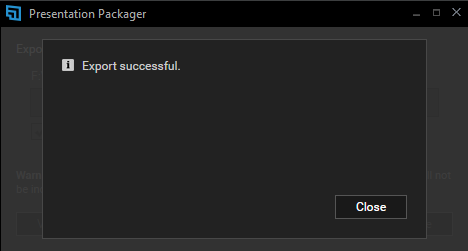
- When confirmation that the export has been completed successfully is shown, you'll be able to find the BPres or BPzip file in the destination folder you chose earlier.
Loading .BPres and .BPZip Presentations
- To load your exported .BPres files, go to File > Load Presentation….
Make sure that the .BPres file and the folder with all the presentation assets are in the same directory and have not been renamed.
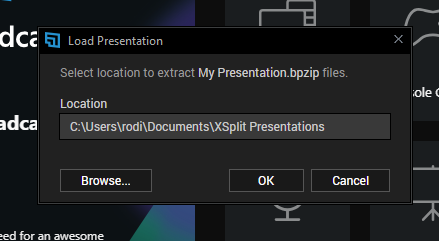
- The .BPZip files generated from the Presentation Packager can be loaded the same way through the File menu but will have to be extracted first. This window will be shown to let you choose which folder to extract the presentation's files to:
OBS Scene Importer
The OBS Scene Importer allows you to import a scene collection from OBS Studio into XSplit Broadcaster for an easy and streamlined way to transition between the two applications.
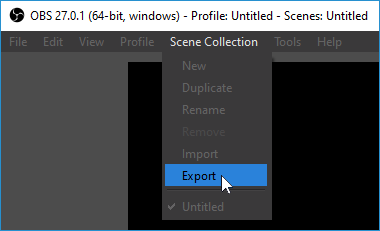
You will have to export your scene collections on OBS Studio first by going to Scene Collection > Export then saving the JSON file.
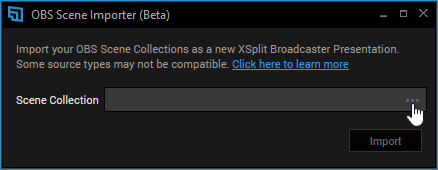
Importing OBS Scenes
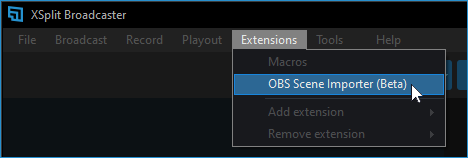
- Go to Extensions > OBS Scene Importer.
If OBS Scene Importer is not shown in the Extensions menu, you will have to install the extension plugin first through Extensions > Add extensions > Find more extensions.
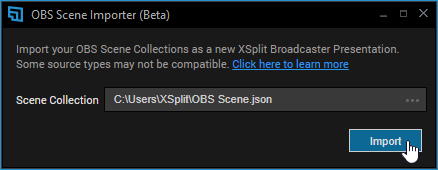
- Click … then browse and select your exported OBS Scene Collection JSON file.
- Click Import to continue.
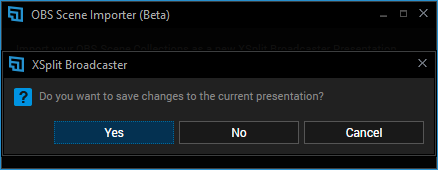
- Before a new presentation is created from the scene collection you imported, you will be prompted if you want to save your current presentation.
Supported Source Types

Supported General Source Properties
The following properties will be imported for sources:
Position, Order, Scale, Flip, Rotate¹ and Volume.
Linked Sources and Groups are also supported for import.
¹ Positioning will be different for Rotate values not in multiples of 90°.
Supported Effect Filters

While OBS Studio supports applying the same effect filter to a single source multiple times, only the latest effect filter of a specific type will be imported using the extension. The only exception is the Crop/Pad effect filter.
Updated on: 14/09/2023
Thank you!