Useful Tips When Adding a Camera
Using your webcam device adds more presentability and personality to your streaming and recording content experience whether it is for your podcast, live conference, music streaming, or gaming.
If you currently have a built-in camera or a webcam device plugged in your computer’s USB port, then let’s get this started!
Adding a Webcam as a Device Source
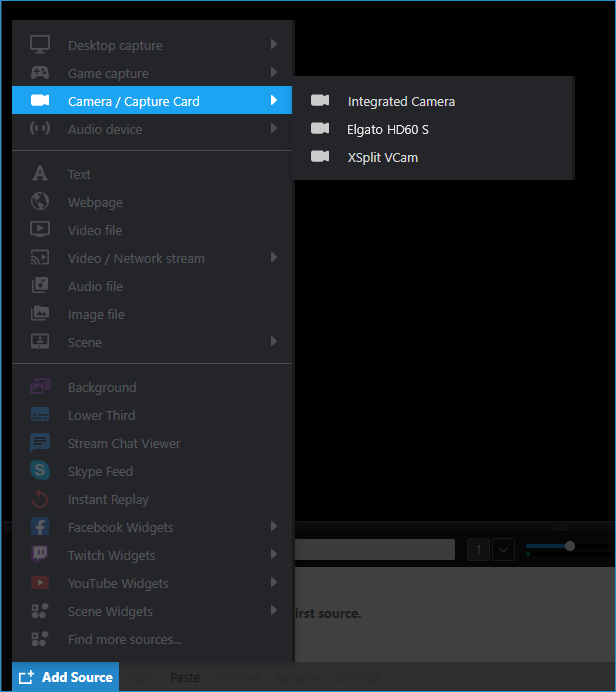
On Broadcaster, click on Add Source > Camera/Capture Card and select your connected webcam device. This will automatically preview your camera onto your scene when added.
You can resize your webcam device source by clicking, holding, and dragging the sides.

Accessing your Camera's Video Output
Unsatisfied with your camera quality? Depending on your camera device’s specs, you can access its camera settings through Broadcaster. Right-click your webcam source to open its source properties window, and go to Configure > Video Output.
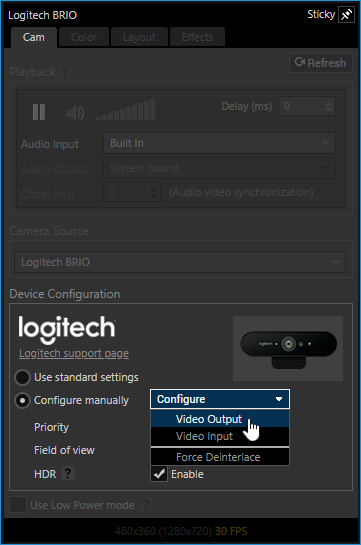
This will open the properties of the camera where you can change the video size and frame rate. Keep in mind, however, some camera devices can have a high frame rate with lowered resolution.

Accessing your Camera's Video Input
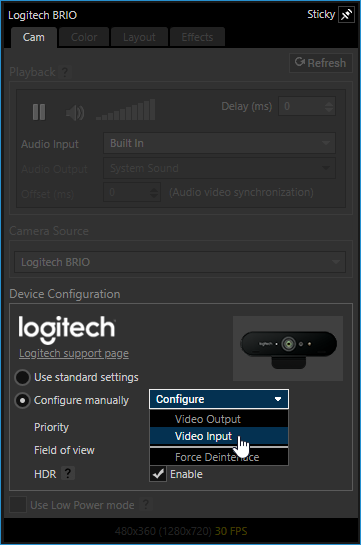
Too bright or too dark? It needs adjustment. You can also access other camera properties by going to Configure > Video Input on the same camera device source properties.
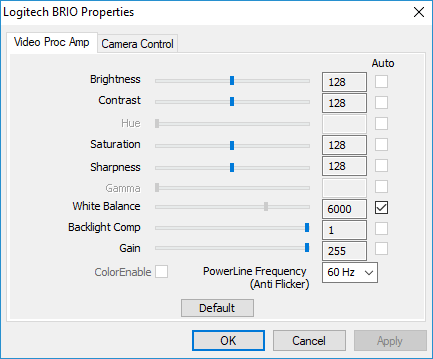
Some functions like brightness, gain, contrast, zoom, tilt, focus, and saturation should be available to you. We also recommend disabling the auto-white balance or auto-exposure so that it won’t let your camera appear flickering if there are any sudden changes in your lighting.
Updated on: 11/08/2022
Thank you!