Recording Two or More Scenes Simultaneously
The later versions of XSplit Broadcaster allow you to record different scenes simultaneously, regardless of which scene is currently displayed in your XSplit preview.
These steps are for when you would like to record Scenes 1 and 2 simultaneously, depending on your personal recording setup, the names and/or the number of scenes you wish to record may differ from below.
This feature is only available on XSplit Broadcaster with a Broadcaster Premium or Premium Bundle license.
Setting Up the Scenes for Recording
Starting/Stopping the Simultaneous Recordings
Accessing your Recordings
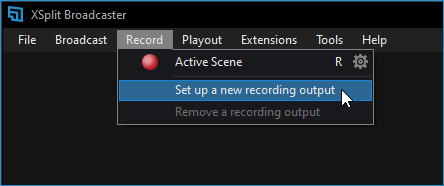
Go to Record > Set up a new recording output to open the Local Recording Properties window.
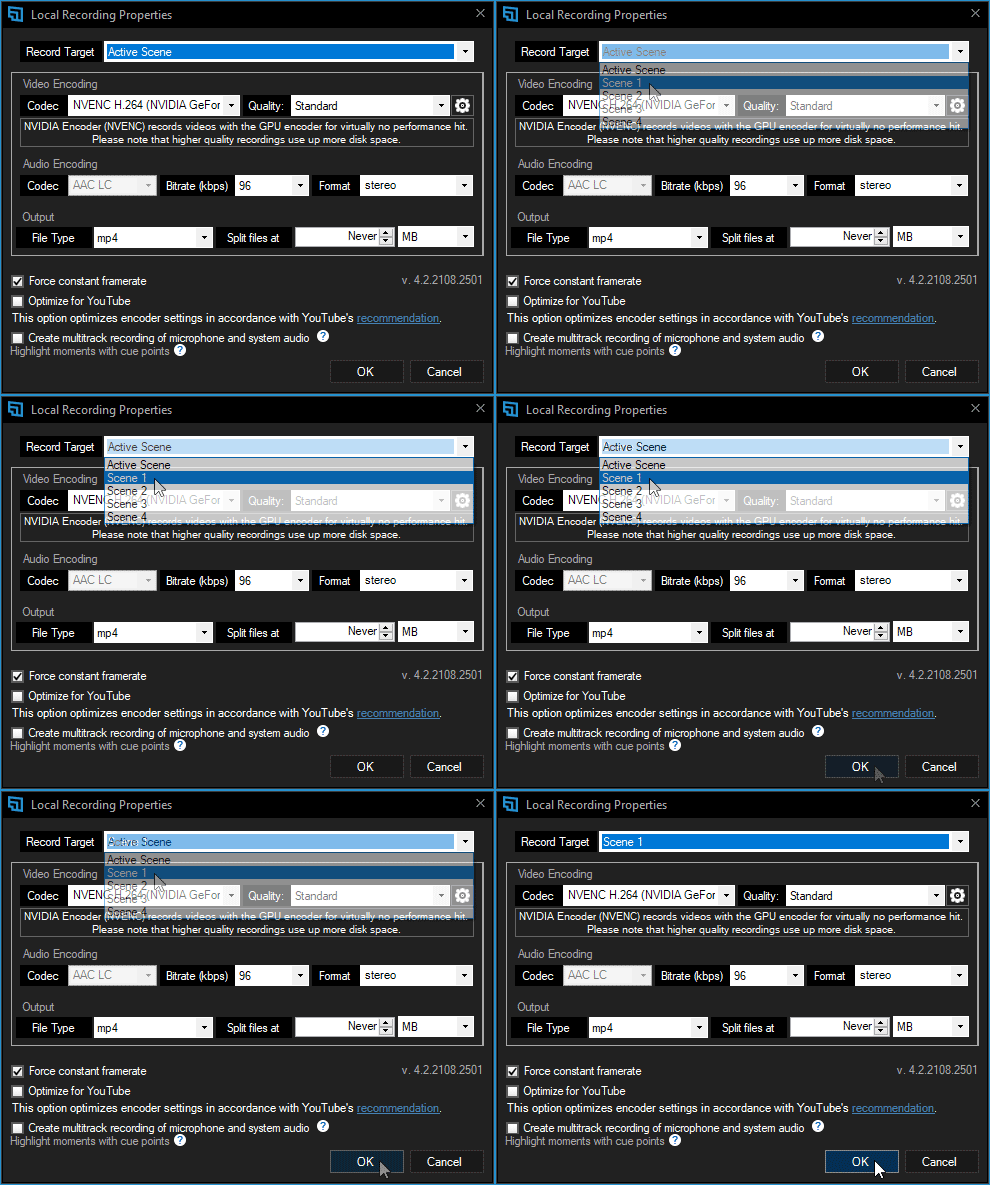
Click Record Target then select the first scene you'd like to set for recording (we'll use Scene 1 as an example) then click OK.
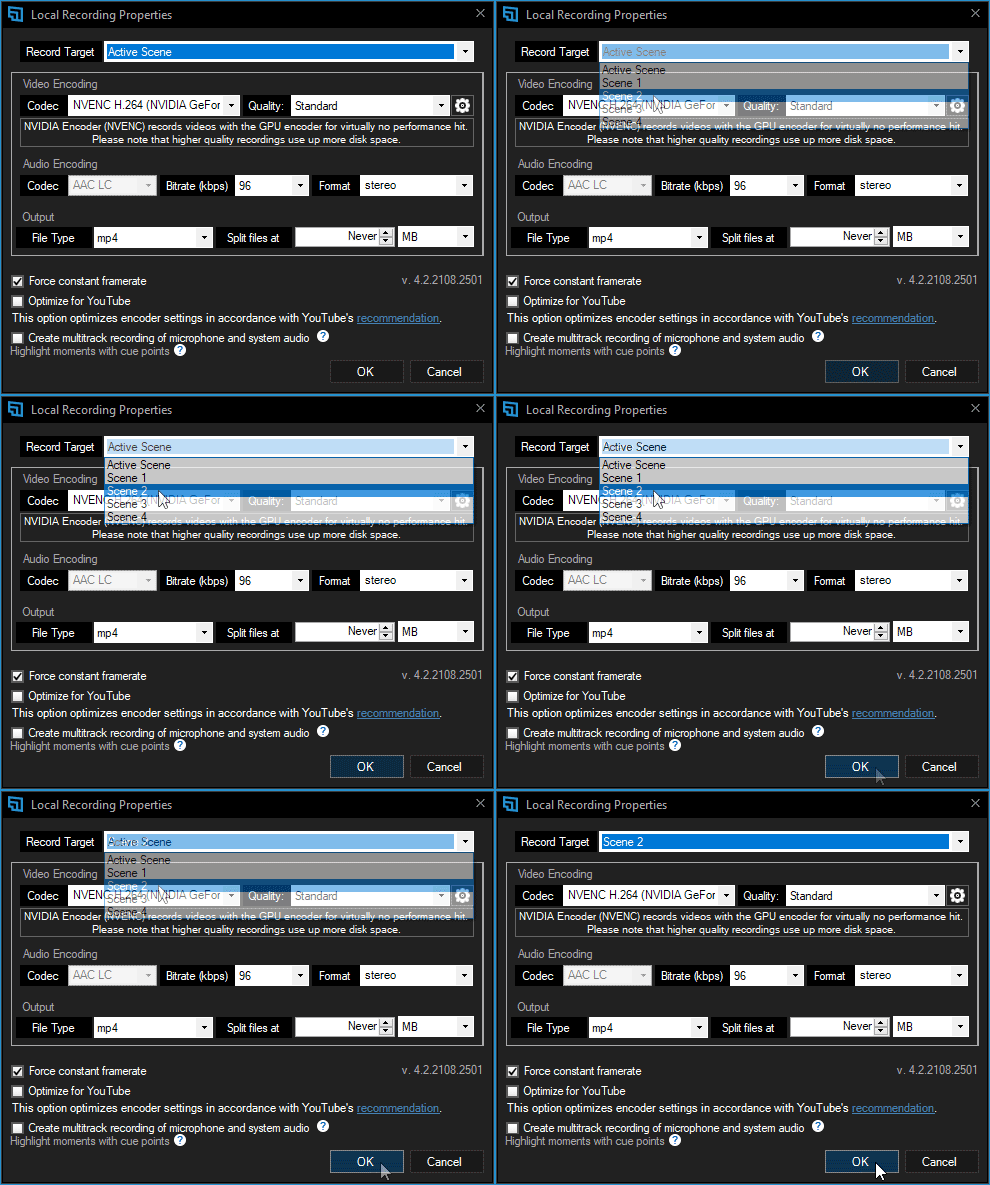
Repeat the process in step 2, but this time, select the 2nd scene you'd like to record simultaneous with the first scene. click OK.
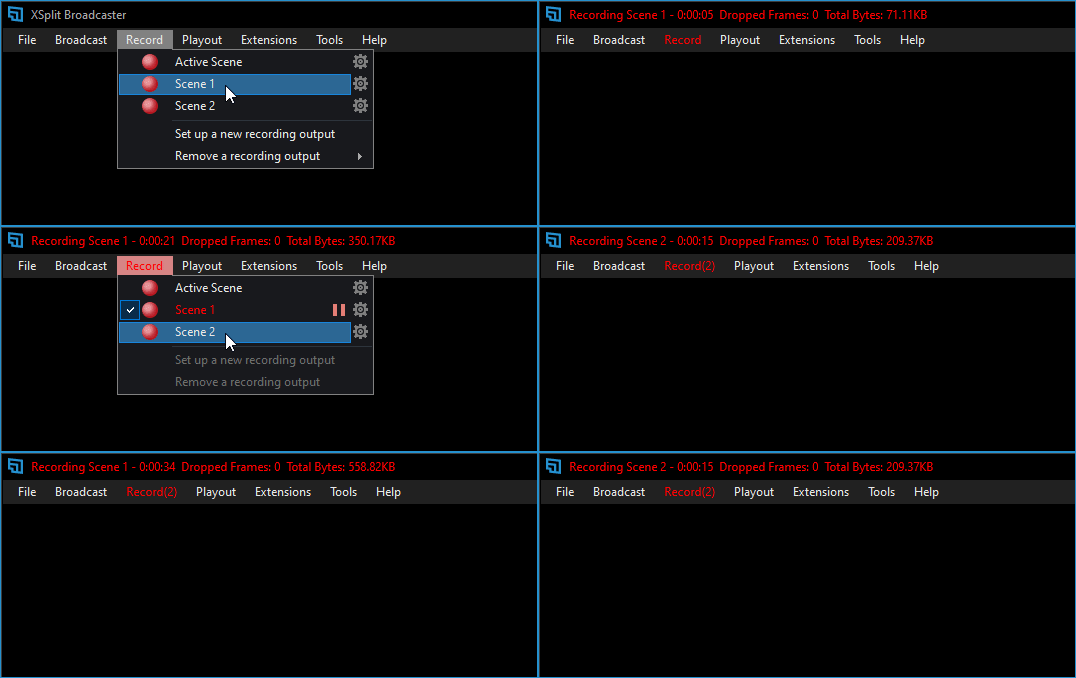
Go to Record > Scene 1 from the list. The red text in the app's title bar will indicate that the recording has started.
Go to Record > Scene 2 to start the second local recording. The number next to the Record menu will indicate the total number of active local recordings.
Local recording uses system resources. The stability and performance of your simultaneous recordings will depend on your computer's Processor, GPU, RAM. Too many simultaneous recordings may cause lag and crashes.
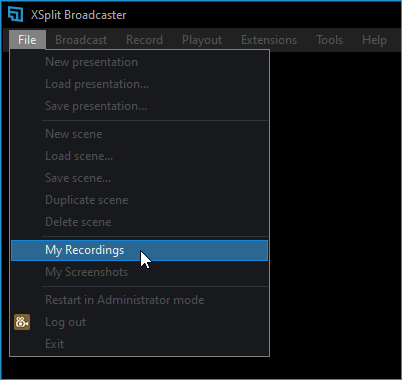
Each scene will generate its own local recording file in your computer. To access this, go to File > My recordings.
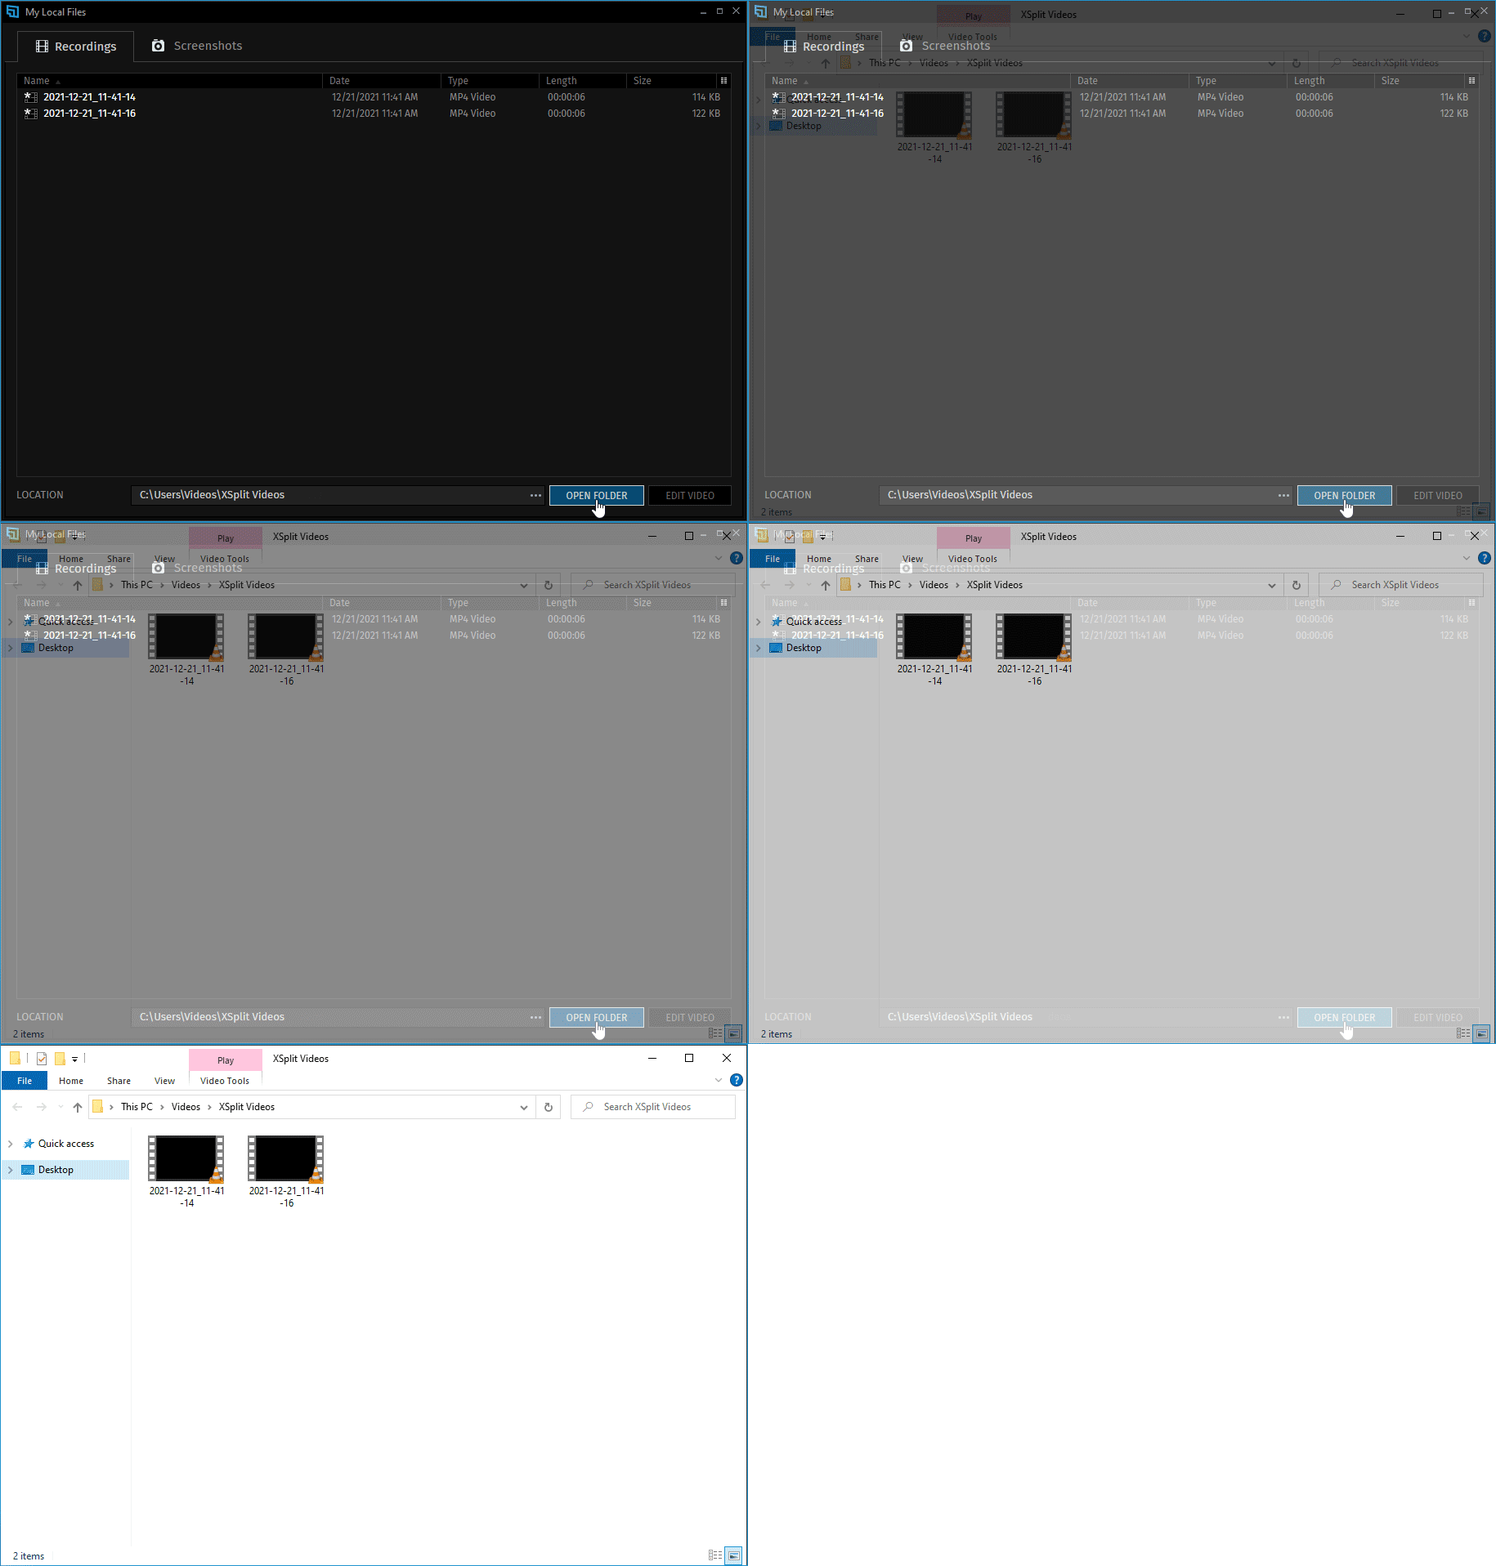
In the My Local Files window, click the OPEN FOLDER at the bottom right. This will open the folder in your computer where the video files are located.
These steps are for when you would like to record Scenes 1 and 2 simultaneously, depending on your personal recording setup, the names and/or the number of scenes you wish to record may differ from below.
This feature is only available on XSplit Broadcaster with a Broadcaster Premium or Premium Bundle license.
Setting Up the Scenes for Recording
Starting/Stopping the Simultaneous Recordings
Accessing your Recordings
Setting Up The Scenes for Recording
Go to Record > Set up a new recording output to open the Local Recording Properties window.
Click Record Target then select the first scene you'd like to set for recording (we'll use Scene 1 as an example) then click OK.
Repeat the process in step 2, but this time, select the 2nd scene you'd like to record simultaneous with the first scene. click OK.
Starting/Stopping The Simultaneous Recordings
Go to Record > Scene 1 from the list. The red text in the app's title bar will indicate that the recording has started.
Go to Record > Scene 2 to start the second local recording. The number next to the Record menu will indicate the total number of active local recordings.
Local recording uses system resources. The stability and performance of your simultaneous recordings will depend on your computer's Processor, GPU, RAM. Too many simultaneous recordings may cause lag and crashes.
Accessing Your Recordings
Each scene will generate its own local recording file in your computer. To access this, go to File > My recordings.
In the My Local Files window, click the OPEN FOLDER at the bottom right. This will open the folder in your computer where the video files are located.
Updated on: 11/08/2022
Thank you!