Creating a Crash/Memory Dump
There will be some cases that the Technical Support staff will request a memory dump from you to help diagnose the cause of the issue.
Automatically generated Crash/Memory Dump
Manually creating a crash/memory dump file using Task Manager
Automatically generated Crash/Memory Dumps
A crash or memory dump file will be automatically generated when the XSplit Broadcaster or XSplit VCam app crashes or abruptly closes unintentionally.
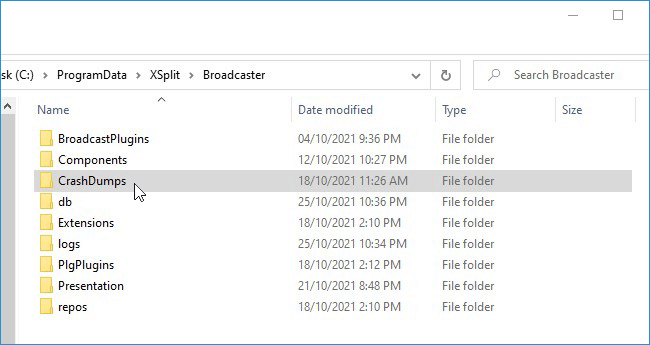
- Locate your app's CrashDump folder by going to these directories in Windows File Explorer:
- XSplit Broadcaster's CrashDump folder will be in this directory: `%ProgramData%\XSplit\Broadcaster`
- XSplit VCam's CrashDump folder will be in this directory: `%ProgramData%\XSplit\VCam`
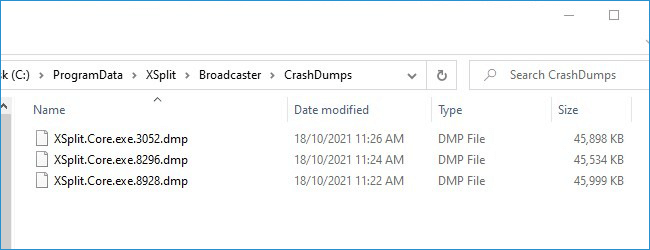
- Check the contents of the CrashDump folder to verify that the dump files were generated:
- For XSplit Broadcaster, the dump files will be named
XSplit.Core.exe.(number).dmp. - For XSplit VCam, the dump files will be named
XSplitVCam.exe.(number).dmp.
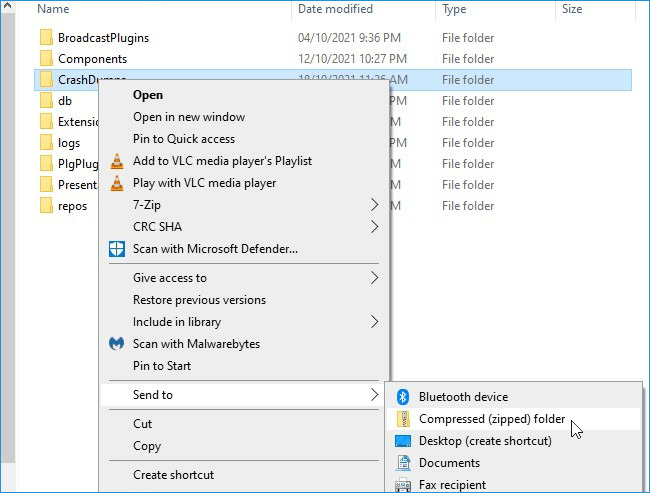
- Go back to the directory where the CrashDump folder is located. You will need to compress this folder into a .zip file so it will be easier to send to the Support Team.
- Windows 10: Right-click on the CrashDump folder, go to Send to then select Compressed (zipped) folder.
- Windows 11: Right-click on the CrashDump folder, then select Compress to ZIP file.
Manually creating a crash/memory dump file using Task Manager
- Reproduce the issue/crash on the XSplit application that you are using.
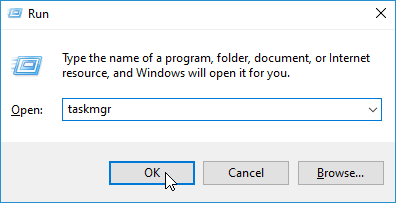
- Go to Start > Run or press the Windows Key + R on your keyboard.
- On the Run prompt, type
taskmgr, hold down the Ctrl and Shift keys then click OK to run it as an administrator.
- On the Details tab, look for your XSplit app process then right-click on it and select Create Dump File.
- For XSplit Broadcaster, look for the
XSplit.Core.exeprocess. - For XSplit VCam, look for the
XSplitVCam.exeprocess.

- A dialogue box will appear with the location of the saved dump file. Click OK and close Task Manager.
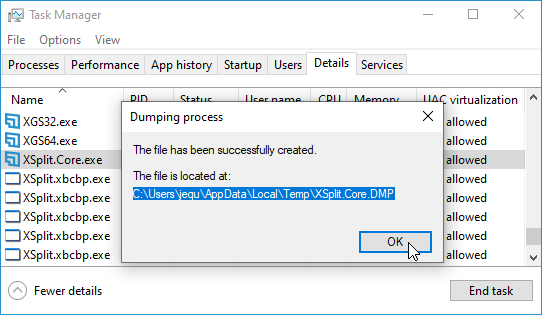
- You can find the saved dump file on
%AppData%\Local\Templocation.
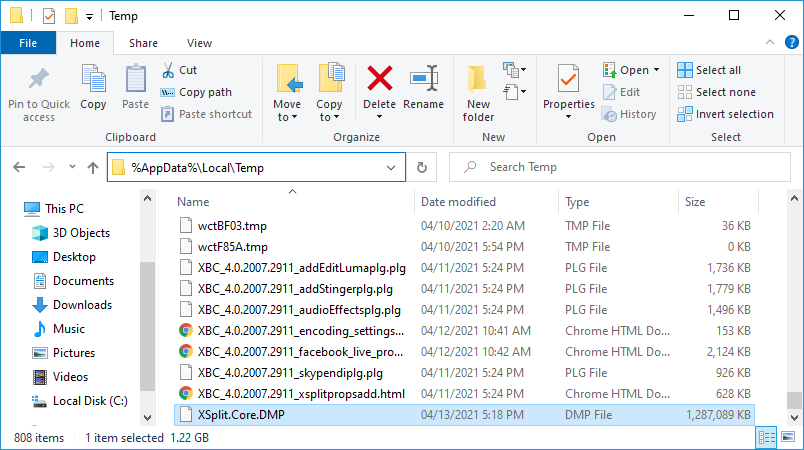
- The created dump file will be too large to attach through email or the Support chat window. Compress the dump file to a .ZIP/.RAR file then upload it to a file-sharing service such as Dropbox or Google Drive.
- Send the file sharing download link to Support.
Updated on: 07/11/2023
Thank you!