Using VCam with Camtasia
When trying to use VCam’s background removal in Camtasia, it will show your original background instead of transparency.
The Remove Background function requires that the application using VCam is connected via ARGB32 and that the application has support for background transparency. While Camtasia connects with the ARGB32 color format, it renders as RGB and ignores the alpha channel.
You’ll still be able to remove your background when using VCam with Camtasia by following these steps:
In VCam, set a solid green image as your background by going to Add Background > Image, Video, or HTML File.

In Camtasia, select the Record tab in the upper-left.

On Camtasia’s Record panel, select XSplit VCam as your camera then click the rec button to record your camera footage as normal.
The camera recording should automatically be added to your Camtasia timeline as a new track like below.
Go to Visual Effects then drag the Remove a Color effect to your camera recording track.
Click the Properties button to show the Remove a Color effect properties. Select the eyedropper tool from the Color drop-down then click on the background of the camera recording. This will make the background color transparent.
The Remove Background function requires that the application using VCam is connected via ARGB32 and that the application has support for background transparency. While Camtasia connects with the ARGB32 color format, it renders as RGB and ignores the alpha channel.
You’ll still be able to remove your background when using VCam with Camtasia by following these steps:
Step 1: Set your background to green in VCam
In VCam, set a solid green image as your background by going to Add Background > Image, Video, or HTML File.
Step 2: Add VCam to Camtasia's Timeline
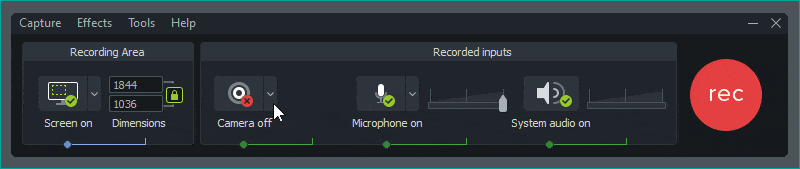
In Camtasia, select the Record tab in the upper-left.
On Camtasia’s Record panel, select XSplit VCam as your camera then click the rec button to record your camera footage as normal.
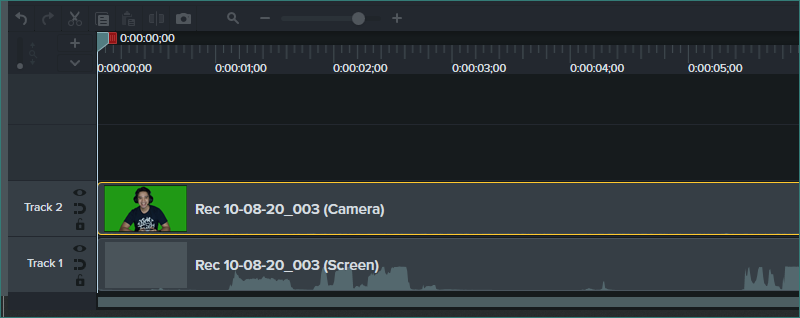
The camera recording should automatically be added to your Camtasia timeline as a new track like below.
Step 3: Remove the background color in Camtasia
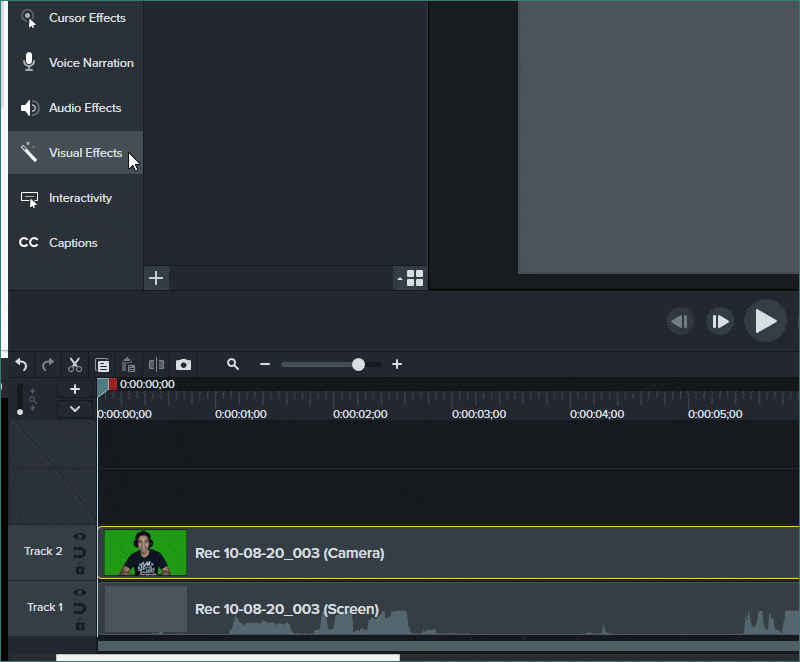
Go to Visual Effects then drag the Remove a Color effect to your camera recording track.
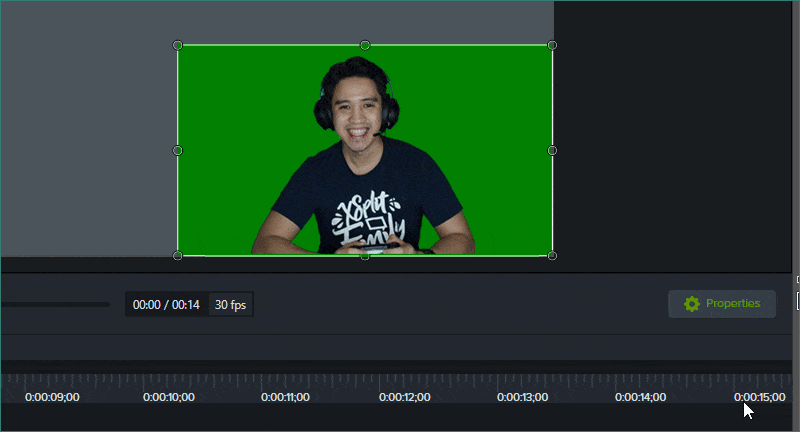
Click the Properties button to show the Remove a Color effect properties. Select the eyedropper tool from the Color drop-down then click on the background of the camera recording. This will make the background color transparent.
Updated on: 16/08/2022
Thank you!