Record Menu (Local Recording)
The Record Menu allows you to record your presentation offline. You will be able to set the quality of your recordings, which codecs are used for encoding as well as split the output into multiple files.
Setting up a Local Recording
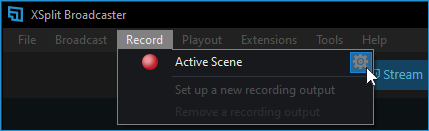
Go to Record, then right-click on Active Scene or click the gear icon next to it to open the Local Recording Properties.
Starting a Local Recording
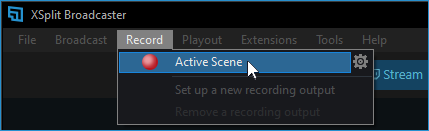
Go to Record then click on Active Scene.
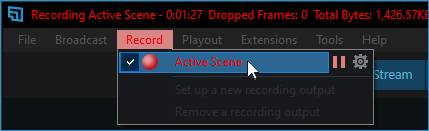
The local recording’s status will be displayed on top of the XSplit Broadcaster window once it has started.
The Record menu will also be displayed in red.

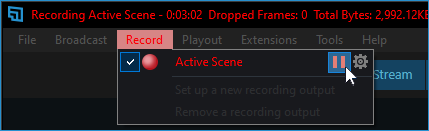
To stop your recording, go to Record then click on Active Scene again.
The Pause icon will appear as well beside Record while a local recording is active.
Locating your Recordings
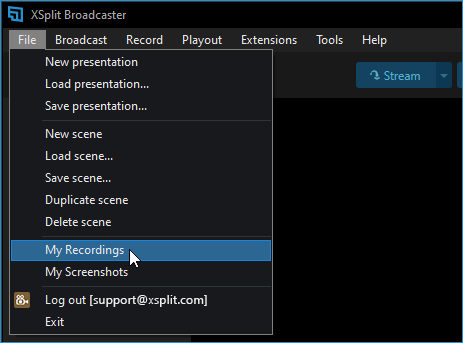
To locate your recordings, go to File > My Recordings. The My Local Files window will pop up after. To learn how to manage your local recordings, click here.
Local Recording Properties

Video Encoding
Codec
Set the codec how your video is processed using either standard x264 (CPU) or GPU codec depending on which hardware is installed. NVENC H.264 for NVidia, VCE for AMD, QuickSync for Intel, and Avermedia’s H.264).
Quality
Set the quality of your local recording to whether standard, high, very high, ultra high, or custom. Choosing higher quality may require better CPU or GPU resources.
Audio Encoding
Bitrate (kbps)
Set the audio bitrate to whether 96 kbps or higher. Choosing higher bitrate produces better and clearer sound quality of your recordings. Bitrates higher than 96kbps is only available on Premium Bundle and Broadcaster Premium license.
Format
Set the format of your local recording’s audio channel to either stereo or mono. Stereo format option is only available on Premium Bundle and Broadcaster Premium license.
Output
Bitrate (kbps)
Set the video output file type to either FLV or MP4.
Split files at
Enable your recording to be split into parts according to minutes or file size. It allows you to easily manage your files and shorten the time to process your videos. This option is only available when MP4 is set as your video output file type.
Force constant framerate
Allows your local recordings to be compatible with various video editing software with different framerate standards. This option is enabled by default.
Optimize for YouTube
Allows you to optimize your local recording’s encoder settings based on YouTube’s recommendation.
Create multitrack recording of microphone and system audio
Allows your local recording to encode separate tracks (system sound, microphone, stream only) in your video file. To learn more about Multitrack Audio recording, click here.
Updated on: 11/08/2022
Thank you!