Generating a DxDiag File
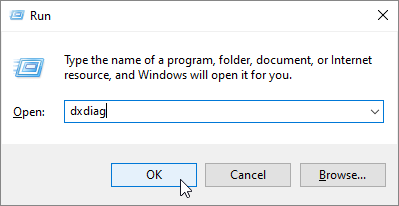
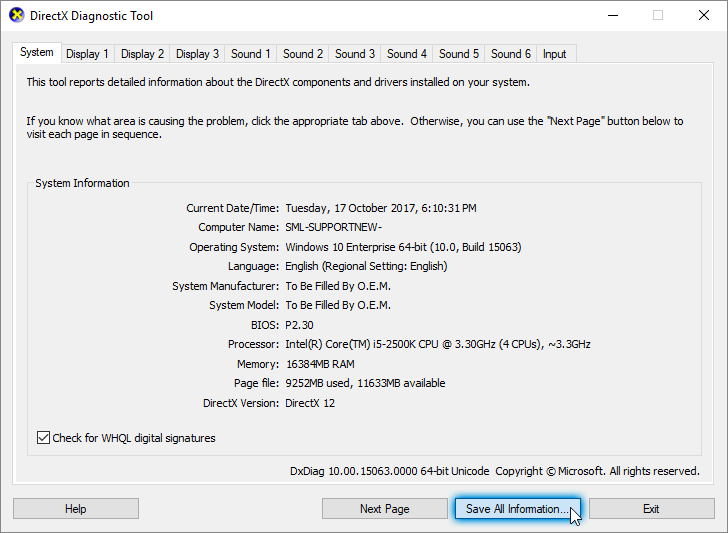
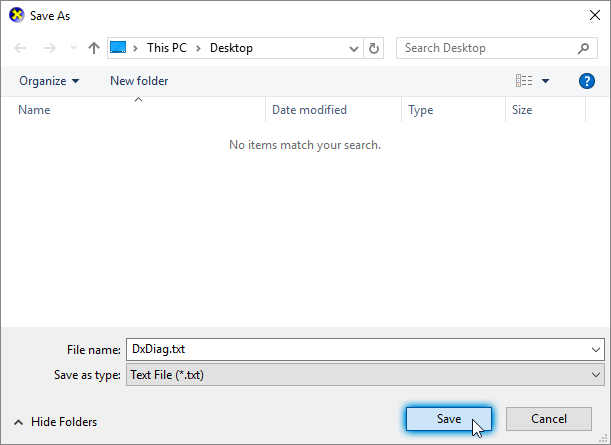
Generating the DxDiag file
Go to Start > Run or ⊞ Windows Key + R.
2.On the Run prompt, type "dxdiag" then click OK.
![Run command in Windows 10 with dxdiag command name](https://cdn4.xsplit.com/helpdesk/images/i/o/462708292/c5a2b9e9ad58f1ee36b0e6c1/dxdiag-run.png)
On the DirectX Diagnostic Tool window, click on Save All Information…
![DirectX Diagnostic Tool system overview](https://cdn4.xsplit.com/helpdesk/images/i/o/462708634/c89853c064e4569edcea4dac/dxdiag-save.png)
Browse to a folder, type in a filename then click Save.
![](https://cdn4.xsplit.com/helpdesk/images/i/o/462708954/c80dce658021f12c81af52dc/dxdiag-file.png)
It's recommended that the folder and filename you choose can easily be remembered and accessible.
Updated on: 12/08/2022
Thank you!